The candidate's interim contract
The interim contract records a temp worker's contract request: the consultant enters it from the candidate, then the contracts team validates it. Each contract is linked to a candidate and usually to a customer account. It carries a unique reference (for example CT-2026-XXXXX) and a status that moves along a validation flow.
Where to find interim contracts
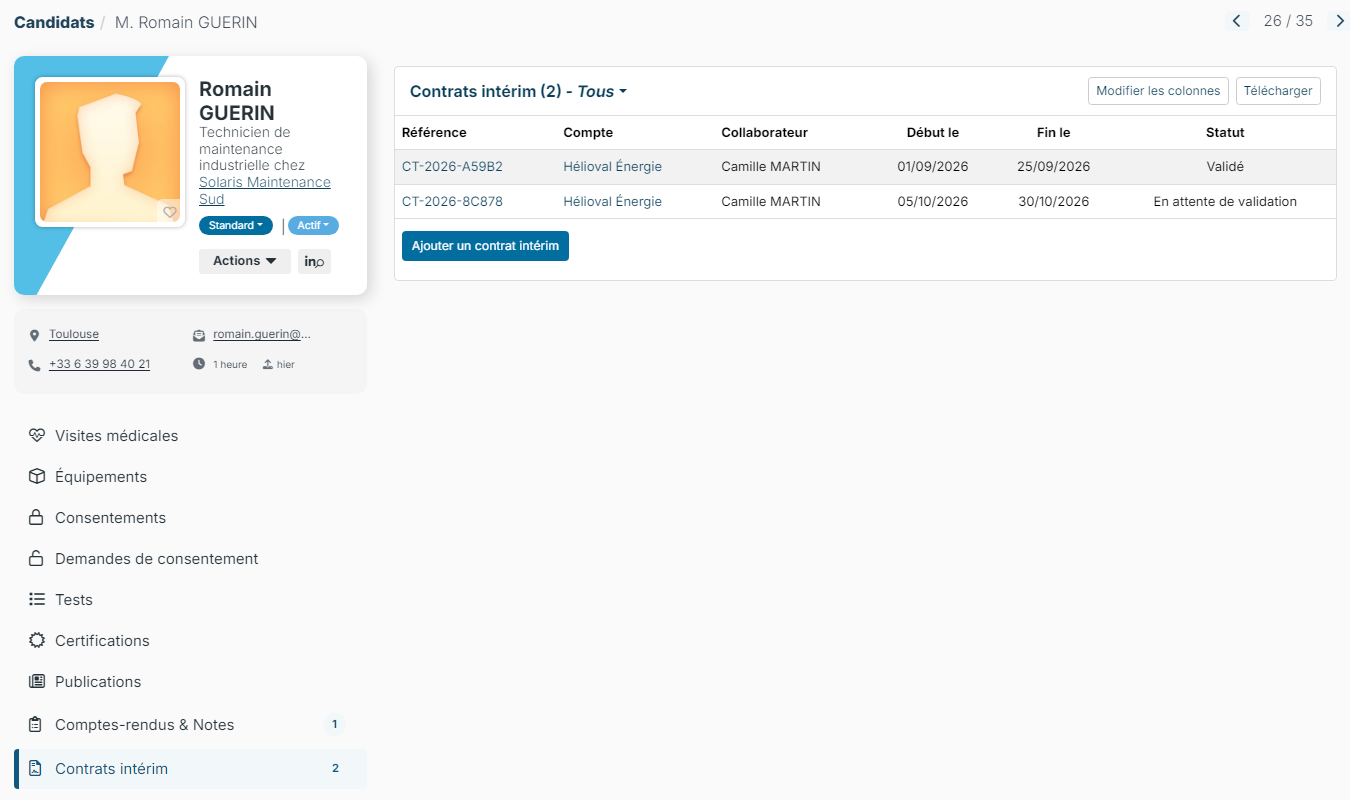
- The candidate sheet has an Interim contracts tab, with a counter.
- The customer sheet has the same tab, listing that customer's contracts.
- The general list, in the Recruitment > Interim contracts menu, offers one tab per status: All, Draft, Waiting for validation, To correct, Validated, Archived.
Contract fields (billed rate, at-risk position, SFAC…) can be added to the columns and filters of these lists with Edit Columns.
In the general list, tick contracts then choose Bulk Updates > Custom fields > the field: the value entered applies to every ticked contract without opening each request (a follow-up comment, for instance).
Creating a contract request
- In the Interim contracts tab of the candidate sheet, click Add an interim contract.
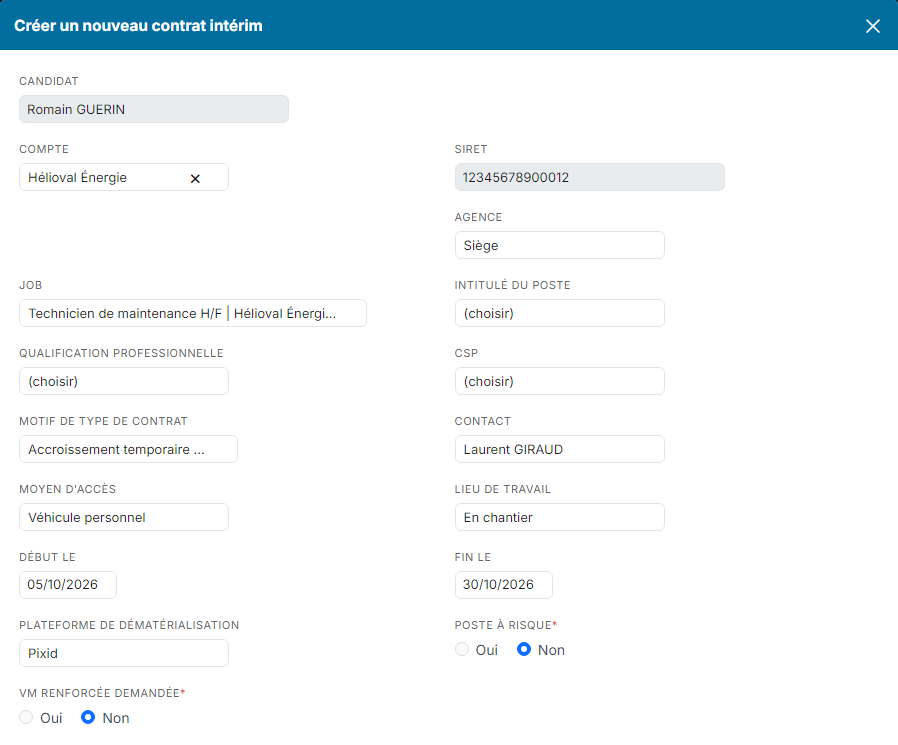
- Pick the Customer: the customer's SIRET is filled in, and the Job list only offers that customer's jobs.
- Pick the Job: the job title, the job characteristics and the mission address are filled in from the job. The job title stays editable.
- The Company and Agency default to those of the consultant entering the contract.
- Complete the header: dates, contact (limited to the customer's contacts), dematerialization platform, at-risk position, reinforced medical visit.
- Complete the next sections (mission location, qualification, mission, schedule, coefficients and rates, bonuses…), then click Save and Send for validation: the contract goes straight to waiting for validation.
The reference is assigned automatically on save.
Contract sections
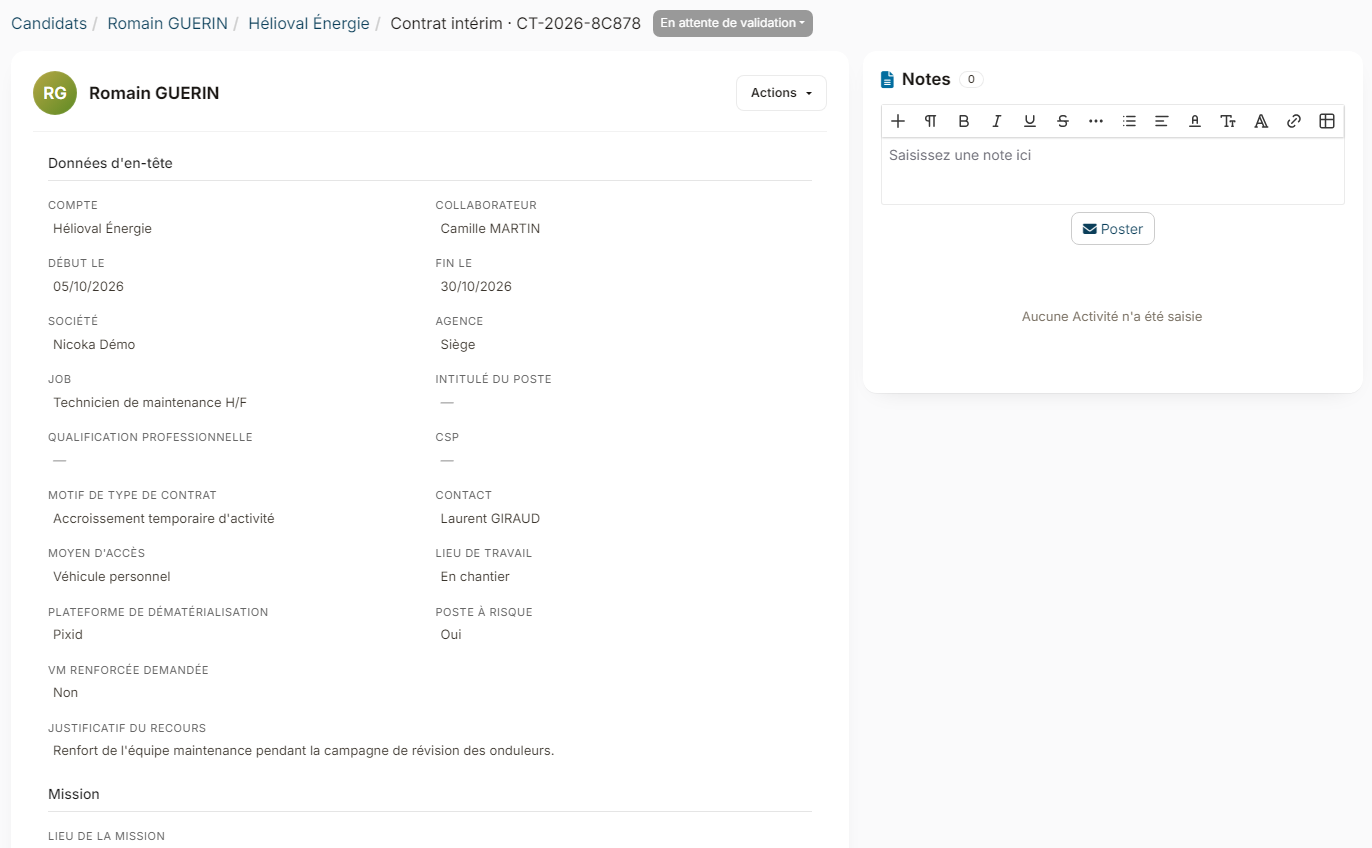
The form and the contract sheet (click a contract's reference to open it) group the information in the same sections, in this order:
- Mission location: street, zip code, city and country of the mission, access mean, work location (on a worksite, at the client site…).
- Qualification: job title, job classification (free text), socio-professional category and professional qualification.
- Mission: reason for use, justification, job characteristics.
- Schedule: weekly hours, start time, morning and afternoon reference schedule, worked days (Monday to Friday by default), schedule details.
- Coefficients and rates: sales code, delegation or management, hours coefficient, paid rate, coefficients on bonuses subject and not subject to contributions, the computed amounts and the SFAC. The paid rate, the billed rate and the bonus amounts are entered and shown with four decimals. The SFAC is validated by default on a new request; its date only shows when it is valid, the reason only when it is not.
- Bonuses: the bonus table, see below.
- Detailed hours: regular, overtime and RTT hours, break time, paid break, night premium (the rate shows on Yes), additional details.
- Instructions: PPE, risks, non-worked closures, other instructions, bonus payment details, additional information.
- Documents required for the mission: documents to provide (licence, vehicle registration, certificates…), accreditations, and a details field for the licence or accreditation type.
- Hardship factors: the factors involved, or the mention that the customer did not communicate them.
- Documents: the files attached to the contract (customer order, mission letter…), dropped from the form with their document type, see below.
On the right, the Notes block lets you exchange with the contracts team directly on the contract.
Bonuses
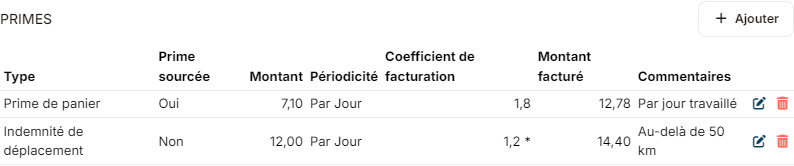
Bonuses are entered in the Bonuses section of the form, one line per bonus. Add a line adds a bonus, the bin icon removes it. For each bonus, fill in:
- its label;
- whether the bonus is subject to contributions or not;
- its amount and periodicity: per hour, per day, per month, mission lump sum or per occurrence;
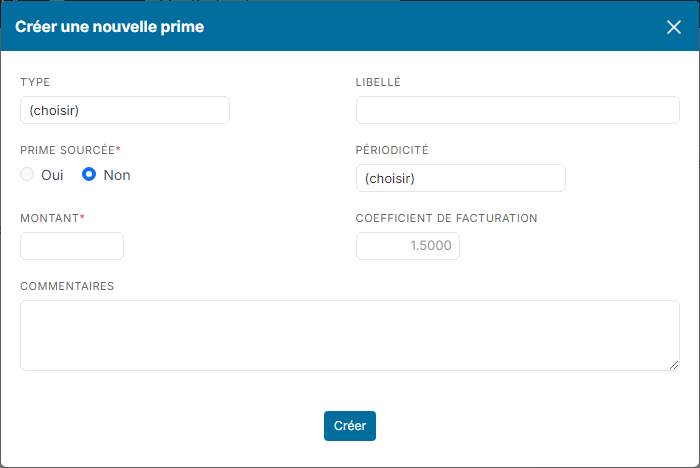
- if needed, comments (attribution conditions). The billed amount of the line shows read-only.
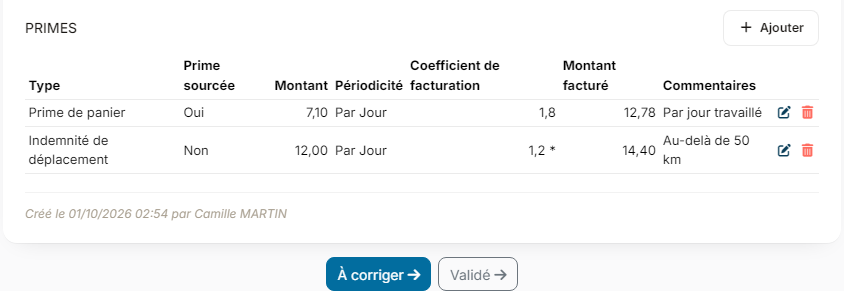
On the sheet, the Bonuses block, below the Coefficients and rates section, lists the bonuses with their billed amount. Its Add button and the pencil icon of a line open a window where a bonus type can also be picked.
The billed amount of a bonus is computed on save: amount × the contract coefficient, the one of the bonuses subject or not subject to contributions, depending on the answer to "Bonus subject to contributions". It follows the changes of these coefficients.
Automatic calculations
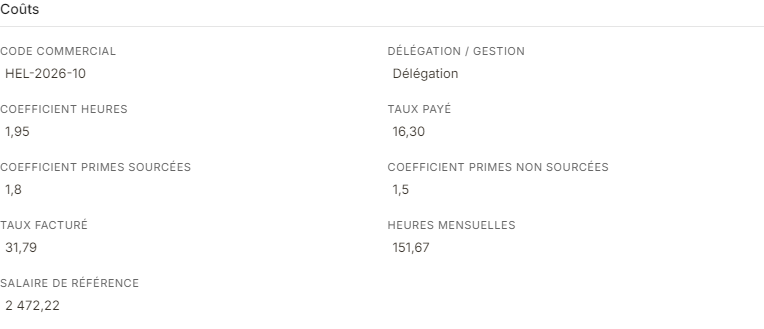
These amounts are recomputed on every save and shown read-only in the Coefficients and rates section.
| Amount | Calculation |
|---|---|
| Monthly hours | weekly hours × 52 ÷ 12 |
| Billed rate | paid rate × hours coefficient |
| Reference salary | monthly hours × paid rate |
| Billed amount of a bonus | amount × contract coefficient (bonuses subject or not subject to contributions) |
Example: for 35 hours a week, a paid rate of 16.30 and an hours coefficient of 1.95, the contract shows 151.67 monthly hours, a billed rate of 31.79 and a reference salary of 2,472.22.
Contract documents
At the bottom of the form, the Documents section attaches one or several files to the contract (customer order, mission letter…): drop them on the area or click the button, then pick the expected document type, as for the documents of a sheet. The types offered are those of your document settings.
On the contract sheet, the Documents block, below the bonuses, lists the files with their type and upload date: click a name to open it, the trash icon to remove it. In the form, the cross of an already filed document removes it too. These documents are filed in the candidate's Documents tab.
Validation flow
| Status | Possible next step |
|---|---|
| Draft | Waiting for validation |
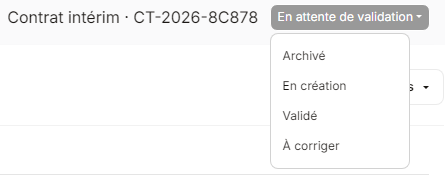
| Waiting for validation | Validated or To correct |
| To correct | Waiting for validation |
| Validated | Archived |
The step buttons show below the contract sheet: they offer the possible next statuses. A contract to correct goes back to the requester, who edits it through Actions > Update the Interim contract, then sends it back for validation. The person assigned to each step is set in the ATS workflow settings.
The status badge, next to the reference at the top of the sheet, also lets you pick another status directly.
The Actions menu
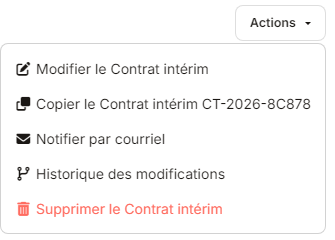
The Actions button of the sheet offers:
- Update the Interim contract;
- Copy Interim contract: see below;
- Notify by email: opens the window to send an email to the candidate, from the contract;
- Change log;
- Delete Interim contract.
Duplicating a contract
For a renewal, open an existing contract and choose Actions > Copy Interim contract. The new request takes over the customer, the mission, the conditions, the costs and the instructions; dates, reference, status and SFAC start afresh. The bonuses of the original contract are taken over in the bonus table and can be edited before saving.
Settings
- Rights: access is set in the profiles, on the "Interim contract" entity. You can for instance restrict validation and deletion to the contracts team.
- Reference lists: reasons for use, access means, work locations, dematerialization platforms and bonus types can be completed straight from the form, with the + button next to the list. They are also managed in Settings > Recruitment > Interim contracts, where an unused value can be deactivated. Five platforms are shipped: Pixid, Peopulse, Armado, DirectSkills and ClickStaff.
- Qualifications and accreditations: they come from the HR settings. If your qualifications are linked to socio-professional categories, the form only offers those of the selected category.
- Custom fields: a field specific to your business can be added as a custom field; it shows at the bottom of the form.
- Unused fields: a standard field your agency does not use (the Required documents for the mission section, for instance, when your custom fields replace it) can be removed from the form and the sheet on request to the support.