Using Lemlist with Nicoka
Lemlist manages your email prospecting campaigns. Once Lemlist is connected to Nicoka, you add your contacts to a Lemlist campaign directly from the contact list, and the addition is logged on their record.
Before you start
- You have an active Lemlist account.
- You are an administrator of your Nicoka workspace.
- The contacts to add have a last name, a first name and an email address.
Step 1 — Create an API key in Lemlist
In your Lemlist account settings, in the integrations section, generate an API key, name it for example "Nicoka", then copy it. Also note the email address of your Lemlist account.
Step 2 — Create the service in Nicoka
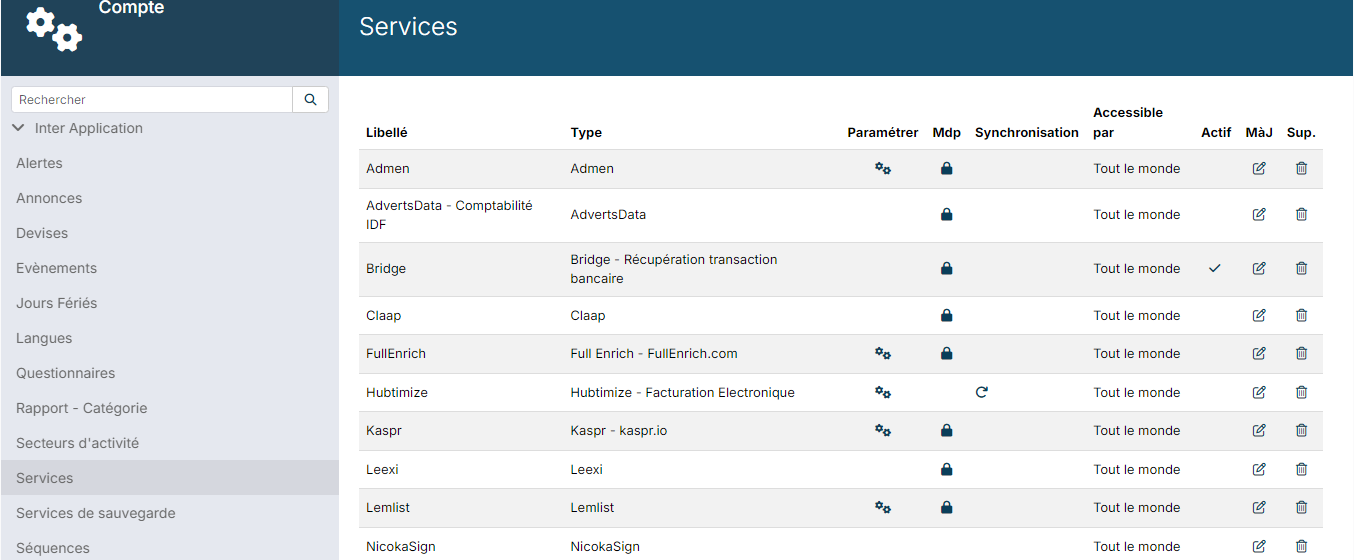
- In the side menu, open Customizing > Administration, then, under Cross Application, click Services.
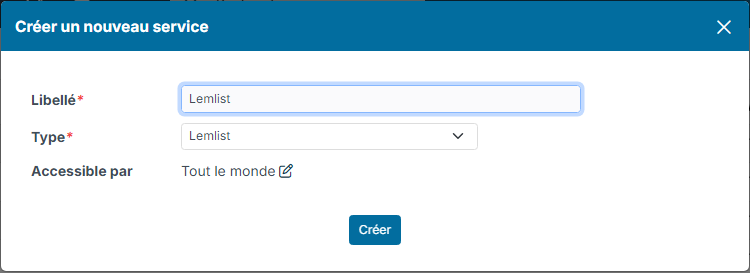
- Click Create a new service.
- Enter a Label, choose the Type Lemlist, then click Create.
Step 3 — Enter the key and activate the service
- On the Lemlist row, click the padlock in the Pwd column.
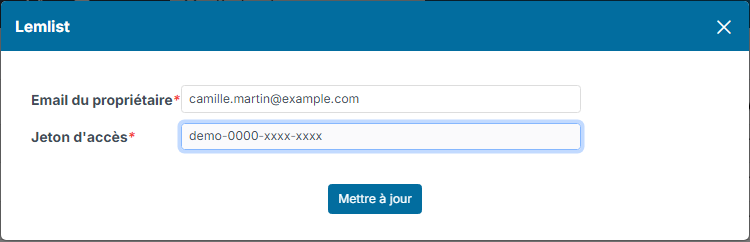
- Enter the email address of your Lemlist account in Owner email and paste the key into Access Token.
- Click Update.
- Click in the Active column of the row: the tick appears.
Sending variables to Lemlist (optional)
Nicoka sends Lemlist the contact's basic information (last name, first name, email…). If your Lemlist sequences use custom variables, you can feed them with fields from the contact record:
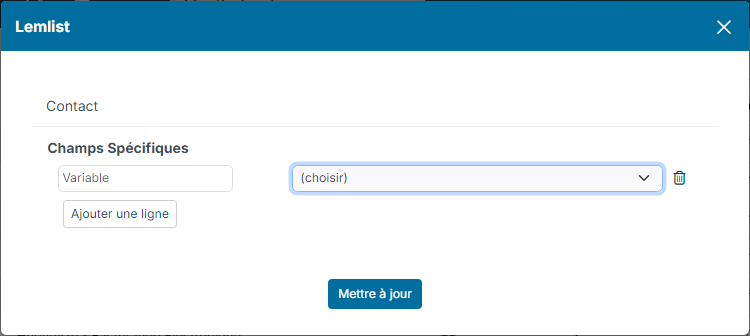
- On the Lemlist row, click the gear in the Customize column.
- In Custom fields, enter the name of the Lemlist variable (without accents), then choose the Nicoka field that feeds it. Click Add a new row to add more.
- Click Update.
Adding contacts to a campaign
- Open the contact list and tick the contacts to add.
- Click Actions, then Add to a Lemlist campaign.
- Choose the Campaign among those of your Lemlist account, then confirm.
An activity is added to the record of each contact added to the campaign. If a contact is already in the campaign, Nicoka updates their information in Lemlist instead of adding them a second time.