The candidate medical visit
The medical visit lets you follow the occupational health path of a candidate (temp worker), from scheduling to the expiry of the fitness certificate. Each visit is linked to a candidate and, usually, to a customer account. It carries a unique reference (for example VM-2026-XXXXX) and a status that moves along a workflow.
Where to find medical visits
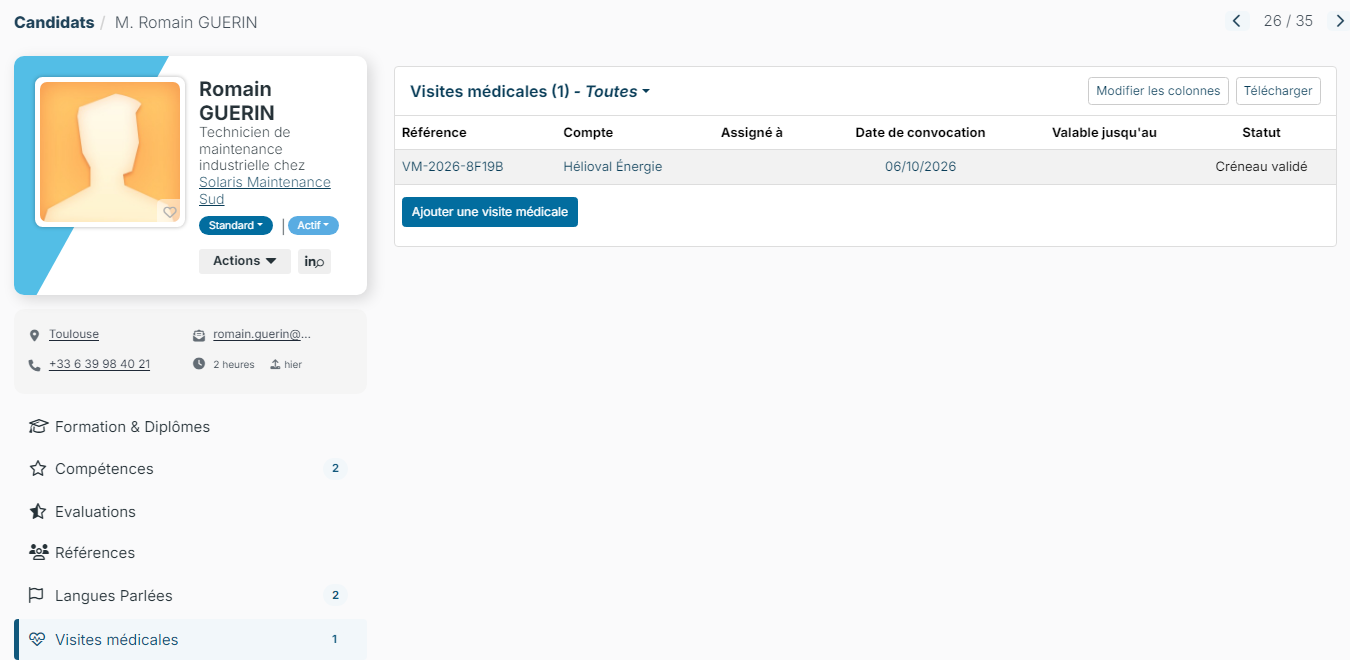
- The candidate sheet has a Medical visits tab, with a counter.
- If you enable it, the customer account sheet has the same tab, handy to follow visits on the customer side.
- The list of all visits has a Medical visits entry in the Recruitment menu. This entry is not shown by default: your administrator can enable it.
Click a visit's reference to open its page.
The visit page
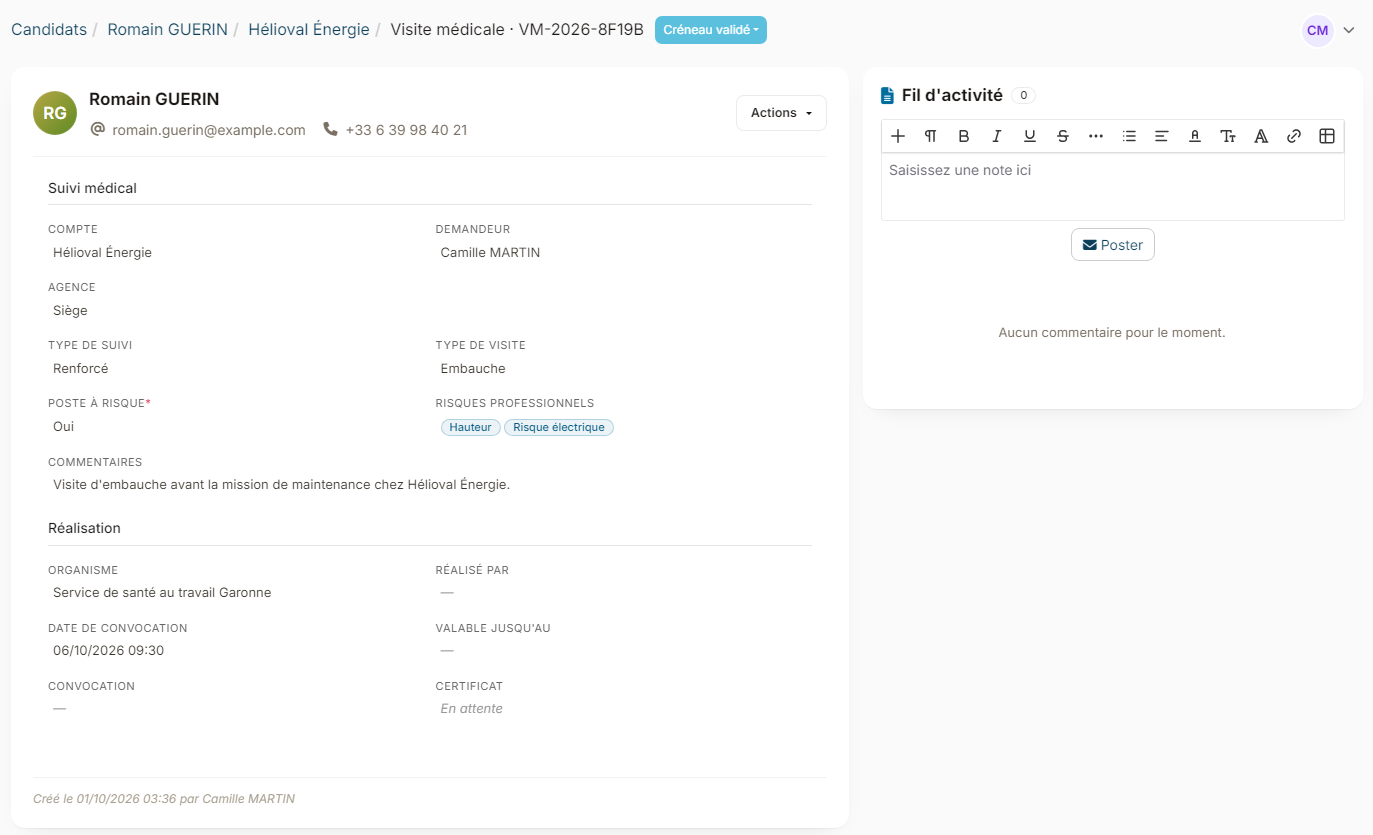
The page has three areas: the header, the visit sheet and the activity feed.
- Breadcrumb: Candidates / candidate / account / Medical visit · reference. Each level is clickable.
- Status: the colored badge to the right of the reference. It opens the status change menu.
- Participants: the avatars of the people following the visit, on the right, with a button to manage them.
- Navigation: previous / next arrows when you came from a list, to move from one visit to the next.
- Candidate identity: their name, email and phone, read-only, so you do not have to reopen their sheet.
The sheet groups the information in sections: medical follow-up (account, agency, requester, types, at-risk position…), completion (organization, convocation date, validity, documents) and, once the visit has taken place, the result (conclusion and recommendations).
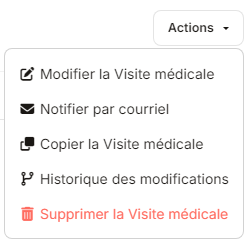
The Actions button offers:
- Update the Medical visit;
- Notify by email: opens the window to send an email to the candidate, with the visit as context (useful to send a convocation or information);
- Copy Medical visit: opens the creation of a new visit, prefilled with the candidate, account, agency, types, qualifications and risks. Dates, documents, result and status stay empty. Handy for a renewal;
- Change log: who changed what and when, status changes included;
- Delete Medical visit.
Creating a visit
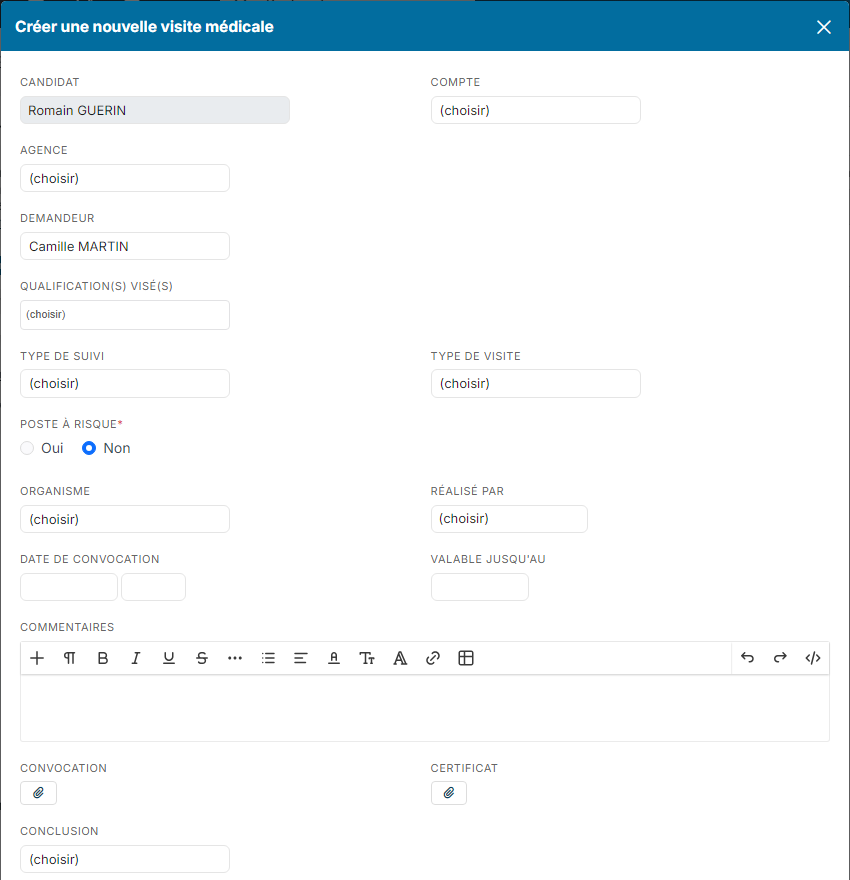
From the Medical visits tab of the candidate sheet, click Add a medical visit (or, from the list, Create a new Medical visit). The form includes:
- Candidate and Customer: the candidate concerned and, if needed, the customer account;
- Location: the agency in charge of the visit, prefilled with yours and editable;
- the requester: prefilled with you; this is the person behind the request;
- Targeted qualification(s): the job titles concerned by the visit;
- Followup Type and Type of Visit: the kind of medical follow-up;
- At-risk position (Yes / No): if Yes, the list of occupational risks appears so you can specify them;
- Organization and Made by: the health center and the person who performed the visit;
- Convocation date (date and time) and Valid until: the appointment and the end of validity of the fitness certificate;
- Comments and Recommendations: free text areas;
- Convocation and Certificate: the attachments (the fitness certificate is the certificate);
- Conclusion: the outcome of the visit.
If your administrator has created custom fields, they are added at the bottom of the form.
On save, the visit gets its reference and takes the starting status of the workflow.
Lifecycle (statuses)
A visit moves along a workflow. The standard path is: To schedule → Waiting for center feedback → Slot proposed → Slot validated → Convocation sent → Fitness certificate received → Valid → Expired. Statuses, their colors and the allowed transitions can be configured (see below).
Changing the status
Click the status badge in the header: all statuses are offered.
- If the target step requires no information, the status changes immediately.
- If the step requires information (for example the convocation date to reach "Slot proposed"), a completion window opens to enter it before confirming.
The buttons at the bottom of the sheet offer the transitions set in the workflow (the logical next step).
To change the status of several visits at once, tick them in the list, then click Actions > Modify Medical visits status. Each visit goes through the same path as a single change: history, assignment and notifications.

Automatic assignment
Each workflow step can assign the visit to one or more people. The visit is then assigned to the first of them ("Assigned to"). The assignment is recomputed on creation and on every status change, so it always matches the current step. The people assigned are set in the workflow (Assigned to column).
Notifications and emails
Emails are sent automatically:
- when the visit is created (notification of the starting step);
- on every status change (notification of the step reached);
- on every new comment posted in the feed (sent to the participants, except the author).
Creation and status change emails are set per step in the workflow (Notifications column): you choose the email template and the recipients, for example the assignee, the requester or the managers of the visit's agency. A step can also send an email to the candidate, for example their convocation.
Emails sent to the candidate leave from the mailbox chosen in the settings (see below) and show in the visit's activity feed.
Three alerts are also provided, inactive: a reminder the day before the convocation, a warning 15 days before the end of validity, and the automatic switch to "Expired" (the day after the "Valid until" date). Your administrator can enable them in the Alerts settings screen.
Participants
Participants follow the visit and receive comment notifications. The list is built automatically: the creator, the requester, the assignee, and anyone who commented on or changed the visit. The button next to the avatars lets you add or remove colleagues. Technical accounts (system, support) never appear.
The activity feed
The input area at the top of the feed is used to discuss the visit. Click Post: the message is saved and an email is sent to the participants (except you). The number next to the title shows the number of comments. Status changes do not appear in the feed: they are logged in the change log.
Documents
The convocation and the certificate (fitness certificate) are added through the edit form. Click an attachment to open it in the viewer. As long as the certificate is missing, the sheet shows it as pending.
Setting up the module (administrators)
- In the side menu, open Customizing > Store.
- On the ATS card, click Customize.
- In the left-hand menu, expand the Medical visits section.
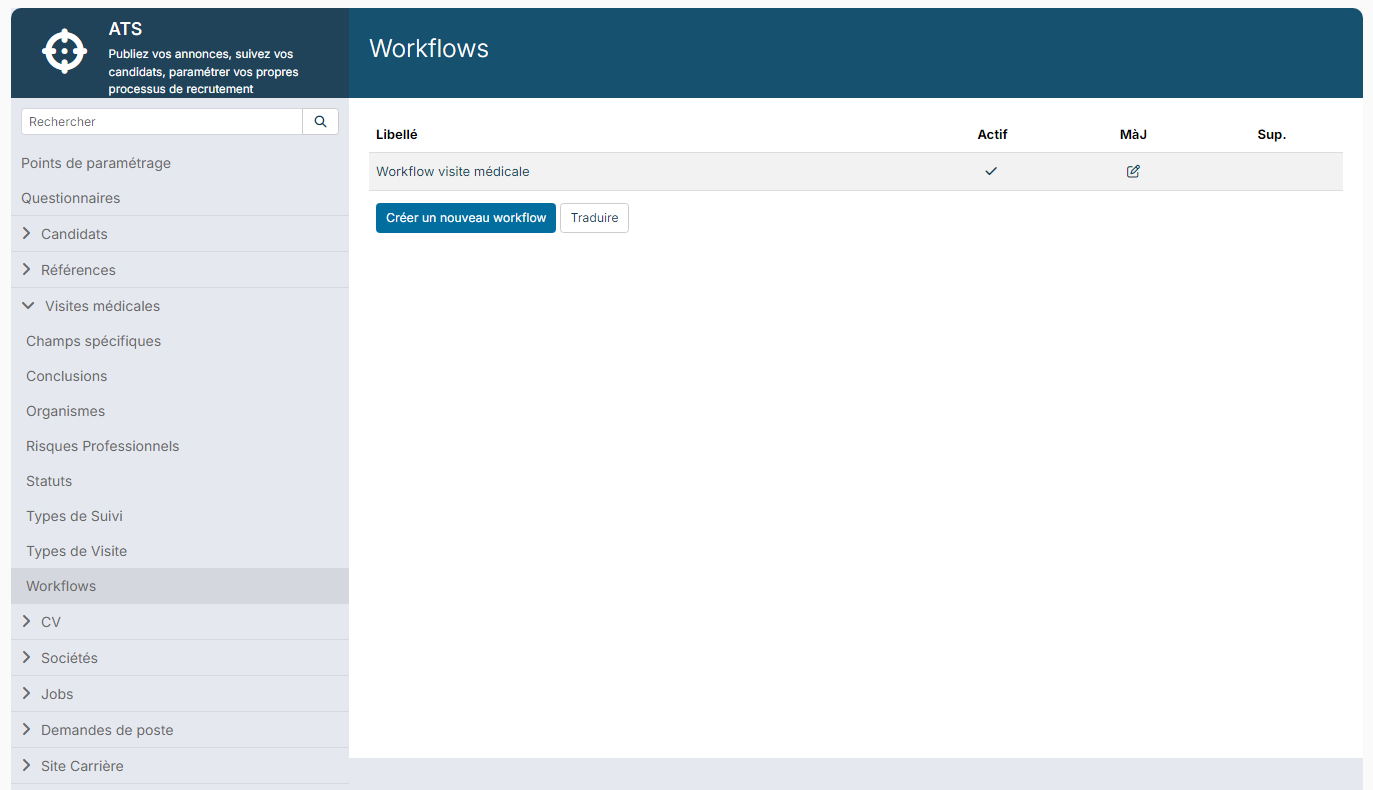
Reference lists
These are the values offered in the form's drop-down lists. You can add, rename or deactivate them:
- Status: the possible states of a visit. Each status has a label and a color: this is the badge shown in the header. A status still in use cannot be deleted.
- Types of Visit: hiring, follow-up, return to work, occasional…
- Followup Types: the type of medical follow-up applicable.
- Organizations: the occupational health centers.
- Conclusions: the possible outcomes (fit, fit with workstation adjustment, unfit…).
- Risks: the list offered when a position is declared at risk.
- Custom fields: fields specific to your business, added at the bottom of the visit form.
A value that is no longer needed can be deactivated: it disappears from the lists without erasing the visits that used it.
The mailbox of the visit emails
In Customizing Points, Medical visits section, the MailBox used to send the medical visit emails setting sets the mailbox used for the convocations sent by the workflow and the comment notifications. When empty, the mailbox set for candidates is used.

The workflow: the heart of the settings
The workflow describes how a visit moves from one status to another, who becomes responsible for it and which emails are sent. Open it through Medical visits > Workflows, then click the medical visit workflow. The Starting Status is that of a newly created visit; each step is then set with the columns below.
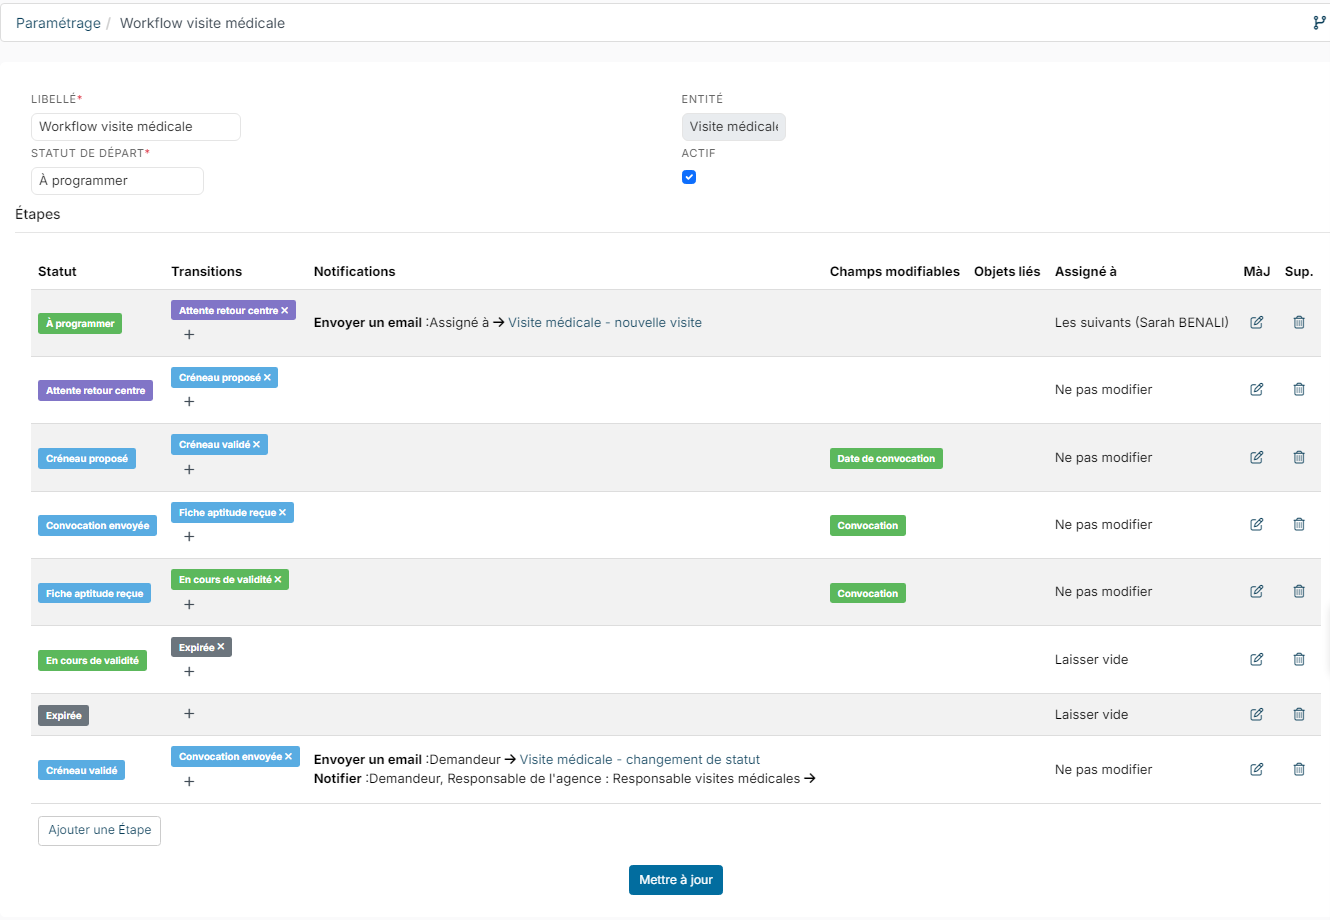
- Transitions: the statuses you can move to from this step. These are the choices offered by the sheet's buttons. Add a transition with the +, remove it with the cross.
- Notifications: the emails or internal notifications sent when reaching the step. For each one, you choose the type, the recipients and the email template.
- Changeable Fields: the information to enter to reach the step, for example the convocation date for "Slot proposed". This setting makes the completion window appear on the status change.
- Related Entities: the extra items that can be attached to the step.
- Assigned to: who becomes responsible for the visit when it reaches the step: Do Not Change (keep the current assignment), Void (nobody), the requester, the user making the change, or The following (one or more chosen people; the first one is assigned).
In practice: one step per status, transitions in the order of the path, an assignee per step, and emails where useful (creation, convocation, receipt of the fitness certificate…).
Access rights
You only see and edit the visits of the candidates you have access to. Viewing a visit requires the read right; editing it (status, comment, documents) requires the update right.