Supplier payment cycle
To pay your suppliers by bank transfer, Nicoka groups the purchase invoices to pay in a payment cycle, records the payments, then produces the SEPA transfer file to upload on your bank's website. This article describes the one-off setup, then each cycle.
1. Allow the payment mode in cycles
- In the side menu, open Customizing > Store, then click Customize on the Purchasing card.
- Expand the Purchasing section and click Payment Modes.
- Check that the Bank Transfer mode is active and ticked in the Allowed in Payment Cycle column. If not, click its pencil icon, tick the box, then click Update.
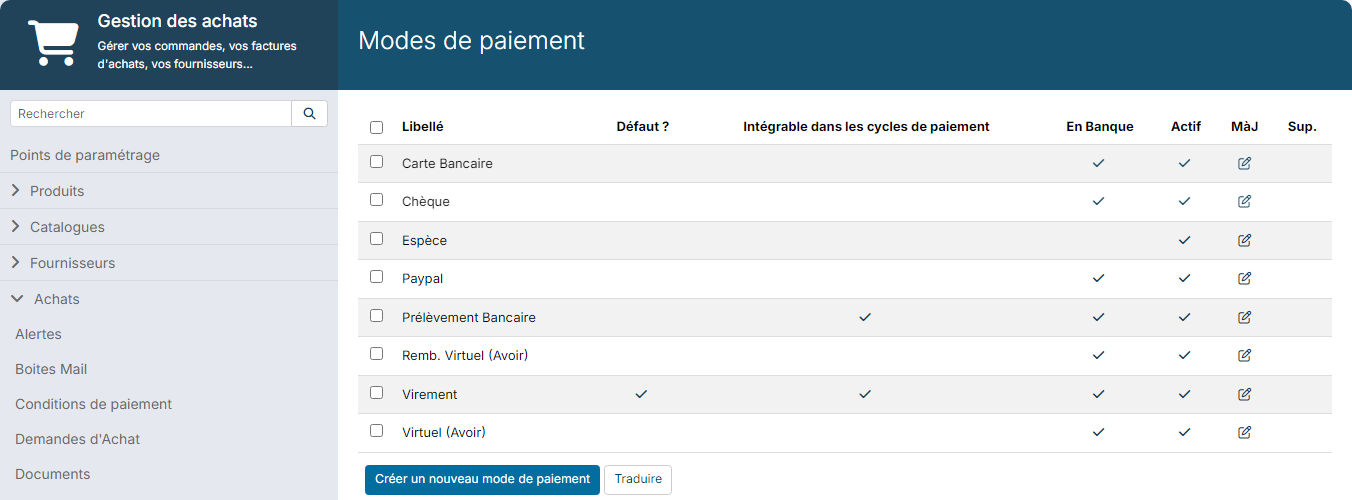
Only invoices whose payment mode is allowed can enter a cycle. This list is shared by purchasing and sales: it is also used for the direct debit cycles of your customers.
2. Fill in your company's bank details
Transfers are made from your company's account. In Customizing > Admin > Companies, open your company, Account Information tab, and enter at least the IBAN and the Swift code. The creditor identifier is only needed to collect direct debits from your customers: see Direct debit cycle.
3. Complete your suppliers' records
- In the side menu, click Purchase, then Suppliers, and open the supplier.
- Open the Info tab and scroll down to the Payments block.
- Choose the Bank Transfer Payment Mode, then enter the supplier's Account Owner, Bank Name, Swift code and IBAN.
- Click Save.
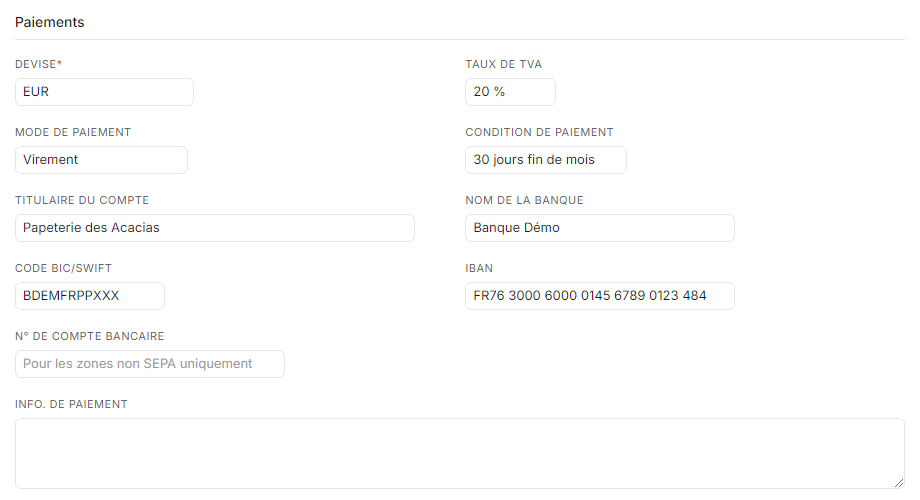
The IBAN and the Swift code are both required: without them, Nicoka refuses to generate the payments of the cycle and names the supplier concerned.
New purchase invoices use the supplier's payment mode. An invoice already entered keeps its own: check it on the invoice if needed.
4. Create a payment cycle
- In the side menu, click Purchase, then Invoices.
- Click Payment Cycles, then Create a new payment Cycle.

- Enter the Date of the cycle and a Label, then click Create.
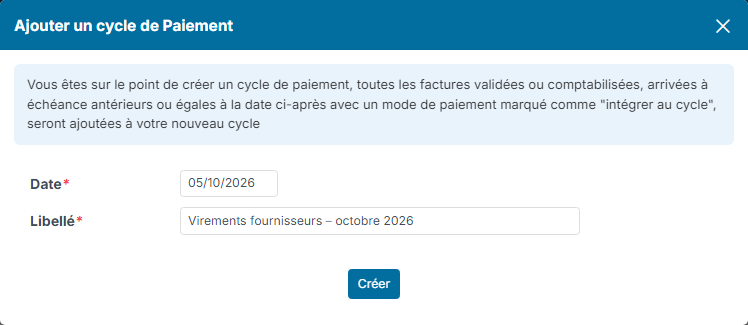
Nicoka adds to the cycle the validated purchase invoices, not yet fully paid, whose due date is on or before the cycle date and whose payment mode is allowed in cycles. For a partly paid invoice, only the amount left to pay is included.
- The cycle opens in Draft status. Check the Items: supplier, invoice, due date, amount, IBAN and Swift code.
- To add other invoices, click Add Purchase Invoices. To remove some, tick them and click Del rows.
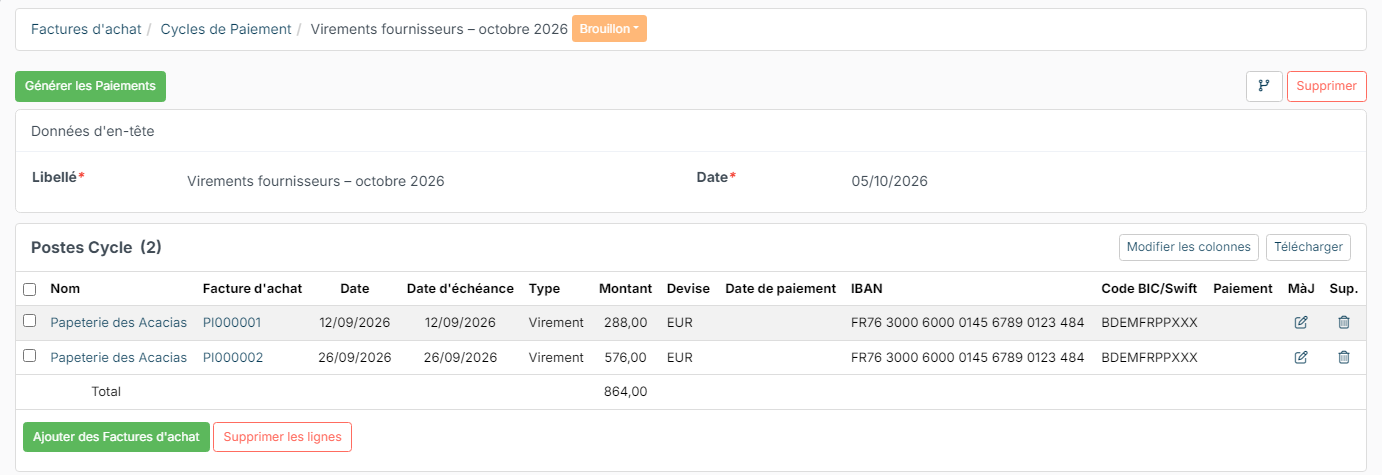
To find your cycles, click Payment Cycles > Payment Cycles in the purchase invoice list.
5. Generate the payments
- On the cycle, click Generate Payments.
- In Payment on, choose the date of the transfers: On Cycle Date, On DueDate of each invoice, 3 days before duedate, 8 days before duedate, or Free entry with an Effective Date.
- Click Generate.
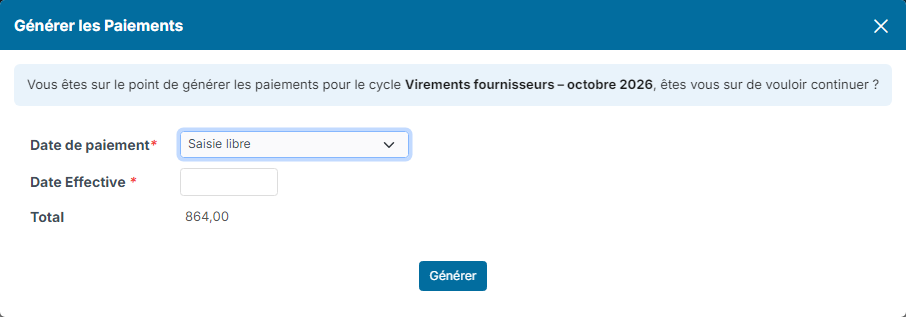
Nicoka records the payments on the purchase invoices of the cycle, which are then marked as paid.
By default, Nicoka groups the invoices of a supplier paid on the same date into a single transfer. To make one transfer per invoice, tick Generate one payment per invoice in the Purchasing customizing, Customizing Points, Payment Cycles section, then click Save. Do it before generating the payments of the cycle.

6. Generate the SEPA transfer file
Once the payments are generated, the Generate SEPA Files button replaces Generate Payments on the cycle. Click it: Nicoka downloads a transfer XML file, to import in your bank's interface to send the transfer orders. The date of each transfer is the payment date chosen in the previous step.
The cycle moves to the File Generated status. To produce the file, Nicoka checks the IBAN and the Swift code of your company and of each supplier; if any information is missing, the file generation is refused.