Publish an announce on the dashboard
An announce shows a message on your colleagues' dashboard: a welcome note, an information notice, a date reminder. You choose where it is shown and who sees it.
Create an announce
- In the side menu, open Customizing > Admin.
- In the left-hand menu, expand Inter Application and click Announces.
- Click the button that creates a new announce.
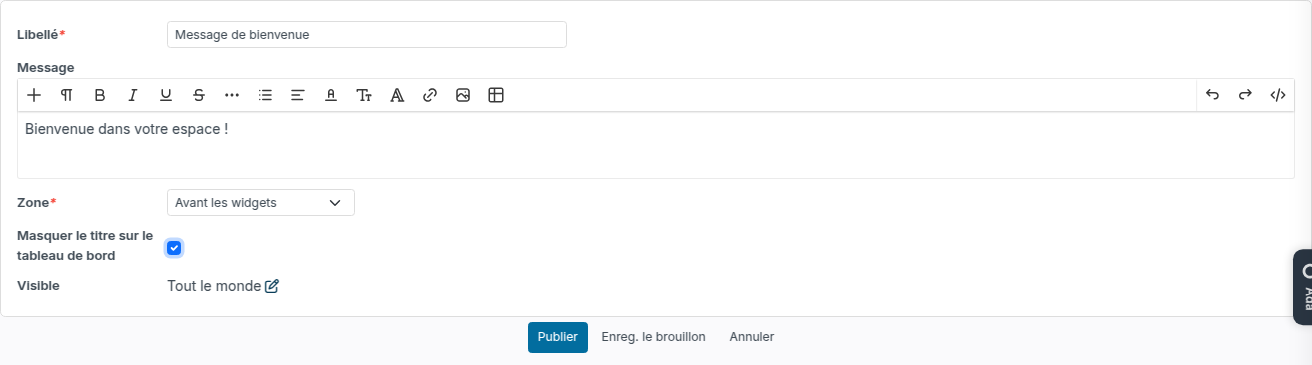
- Fill in the Label, then write the Message: formatted text, images, links.
- Choose the display area (see below).
- Set Visible: everyone, or some colleagues, departments or profiles (pencil icon).
- Click Publish. The people concerned receive a notification. Saving as a draft keeps the announce without publishing it.
Choose the display area
- On top (before widget board): the whole announce is shown at the top of the dashboard.
- Announce Widget: the widget lists the announce titles; a click opens the announce. The widget must be on the dashboard (see Dashboard - Customization).
- On bottom (after widget board): the whole announce is shown at the bottom of the dashboard.
Hide the title
Before or after the widgets, the announce shows its label as a title above the message by default. Tick Hide the title on the dashboard to show the message only, for instance a welcome banner. The box is offered for these two areas only: the announces widget always shows the titles.

The label stays mandatory: it identifies the announce in the announces list, and serves as the title of the notification and of the email.
After publishing
Open the announce from the list to edit it and click Update, to Send by email to contacts, or to Cancel Publication: it then disappears from the dashboards and its notifications are removed.