Using Noota with Nicoka
Noota records, transcribes and summarizes your meetings with artificial intelligence. Once Noota is connected to Nicoka, the reports of your meetings with candidates or contacts are added to their records automatically.
Prerequisites
- A Noota account whose subscription gives access to the Noota API.
- The email address of your Noota account.
- An email address (or a phone number) on the records of your candidates, contacts or employees: this is how a report is linked to the right record.
The connection is personal: each user connects their own Noota account from their own area, with no particular administration right.
1. Create an API key in Noota
In Noota, open the Developer > API keys menu and create a key with call read access enabled. Copy it: you will paste it into Nicoka in the next step. If you cannot find this menu, see Noota's help.
This key is confidential: do not send it by email or in a ticket, and enter it into Nicoka yourself.
2. Connect your Noota account in Nicoka
- At the top right, click your initials, then Integrations.
- In the AI note taking panel, click Connect my Noota account.

- In the Connect Noota window, check the Noota account e-mail (your Nicoka address is suggested by default) and paste your Noota API key.
- Note the address shown under the fields: this is the URL to declare in Noota in step 3.
- Click Save.
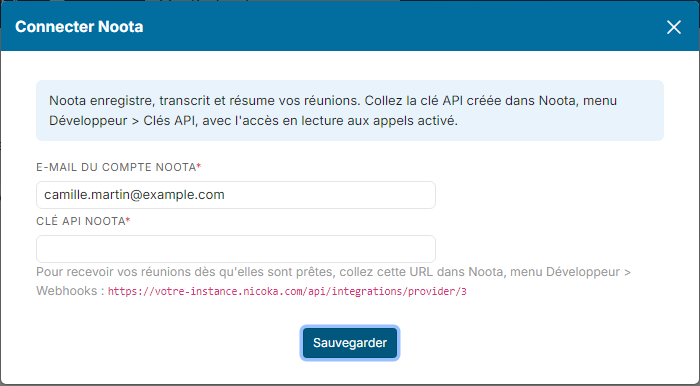
Nicoka checks the key with Noota before saving it. If it is refused, the message "Noota refused this API key" is displayed: check that it is still valid and that call read access is enabled. Once the connection is accepted, the confirmation message reminds you of the URL to declare in Noota.
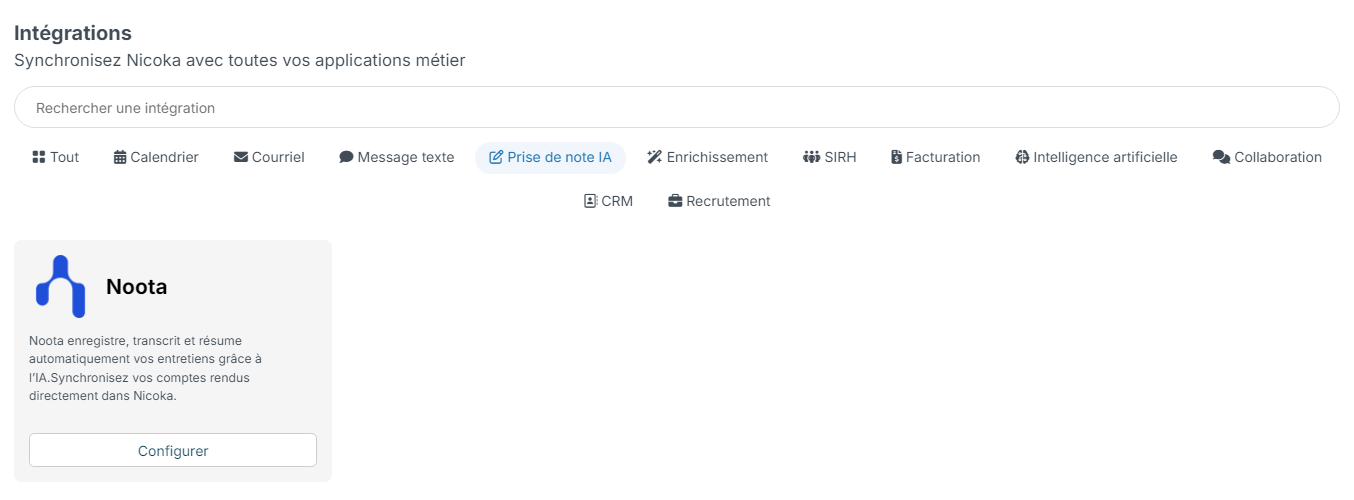
For administrators: the same connector is available in Customizing > Integrations, on the Noota card (Configure button). The connected account remains that of the person who enters their key.
3. Declare the webhook in Noota
The webhook lets Noota send each report to Nicoka as soon as it is ready.
- In Noota, open the Developer > Webhooks menu and add an endpoint.
- Paste the URL shown by Nicoka. It looks like
https://YOUR-INSTANCE.nicoka.com/api/integrations/provider/3. - Subscribe the webhook to the end-of-recording event (
record.completed), then save.
Had you already declared the old address https://YOUR-INSTANCE.nicoka.com/api/application/services/noota/notification/hook in Noota? It remains valid. Just check that your Noota account shows up in your Integrations; if it does not, connect it as described in step 2.
Warning: check how private recordings are shared. In Noota, open Settings > Sharing and turn off the Do not share private recordings with API integrations option. It is on by default: while it is on, the recordings you keep private (not shared with the team or made public) are neither sent to the webhook nor exposed through the API, so their reports never reach Nicoka.

This screenshot shows the Noota interface as it was when this page was written. If Noota changes its settings, the option may be worded differently or located elsewhere: look for the setting that keeps private recordings from being shared with API integrations, or check the Noota help center.
4. Check the connection and retrieve meetings
Once your account is connected, the Manage transcripts button of the Noota card opens a follow-up panel:
- Connection configuration: the status of the account, its owner, the people who can access it, and the Import records button, which lists the latest recordings of your Noota account so you can import one. This is useful to check that the connection works without waiting for the next meeting, or to retrieve a report the webhook did not send.
- Receiving meeting reports: the URL to declare in Noota (Copy URL button), the Last synchronization date and the connection date.
- Retrieve past transcripts: the Retrieve button imports all the meetings of a period (Since, Until). A report already in Nicoka is never duplicated.
5. Find the reports in Nicoka
Once Noota is connected to Nicoka and to your calendar, each report reaches Nicoka automatically. Nicoka links it to the meeting participants through their email address or phone number:
- on a candidate record, the report appears in the timeline, with the meeting title and the summary written by the AI;
- if no candidate is found, it is linked to the recognized contacts;
- it is also added to the employees recognized among the participants.
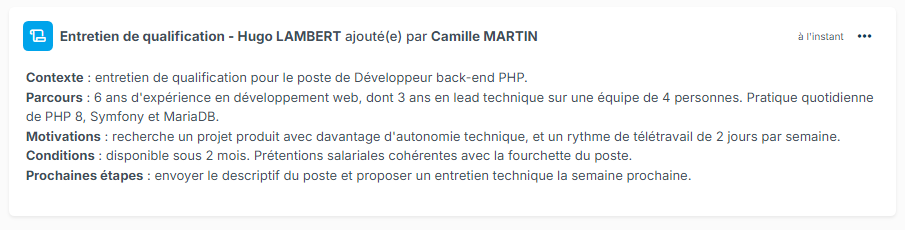
You receive a notification when a report is added. If no participant is recognized, the notification tells you so and lets you link the report to a record yourself.
You can also install the Noota app on your phone to record your calls: their reports reach Nicoka the same way.
6. Fill in a questionnaire from the report
A Noota report can be used to fill in a questionnaire: a candidate evaluation, a contact's CRM questionnaire or an employee interview. From the report activity in the timeline, choose for example Fill a review from this meeting: the AI enters the answers it finds in the meeting, and you review them before validating.
If the meeting is scheduled in the Nicoka calendar with an event type set up for it, the candidate's evaluation or the contact's questionnaire is even pre-filled automatically as soon as the report arrives.
Everything is explained in Filling in a questionnaire with AI from a meeting.
7. Personal data
In Noota's settings, you choose what is recorded (audio, video, or only the transcript), you can hide the participants' last names and turn off the automatic start of Noota in your meetings. See Noota's help for these settings.