Create an order and add rows
What this page covers
An order records what your customer has ordered from you. It is made of a header (customer, type, dates, references) and of rows, also called items: each row describes a service or a product, with its price and VAT. These rows are then used by the billing schedule and by invoicing.
This page explains how to create an order, then how to add, edit, reorder and delete its rows.
1. Create the order
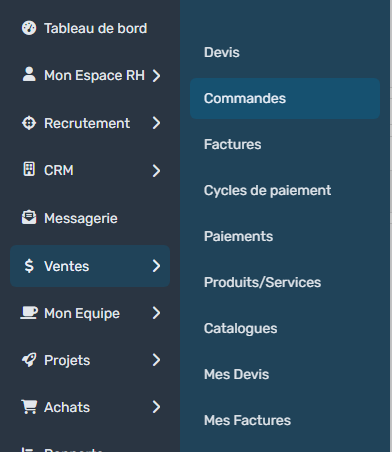
- Go to the Sales menu, then Orders.
- Click Create a new Order.
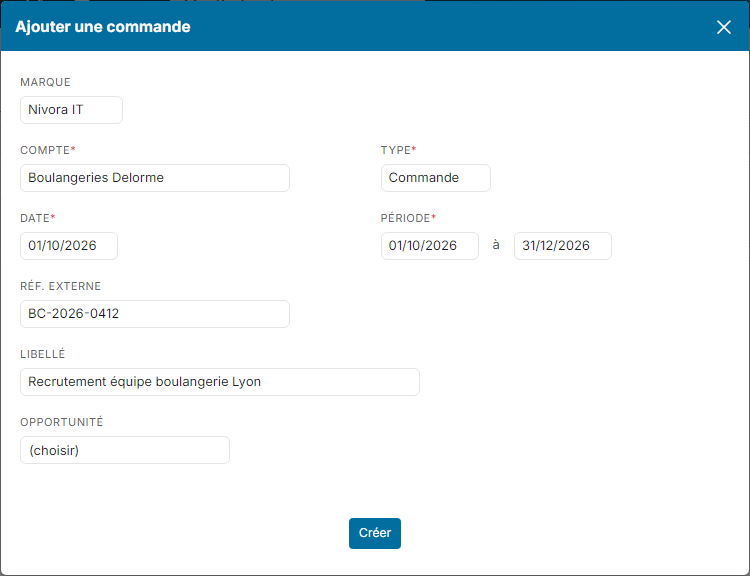
- Fill in the Customer, the Type, the Date and the Period of the order. Fields marked with an asterisk are mandatory.
- If needed, fill in the External Reference (your customer's purchase order number), the Label and the originating Opportunity. If your company manages several brands, also choose the Division.
- Click Create. The order opens at the first status of its workflow (for example Draft).
2. Add a row
Rows are in the Detail tab of the order, below the header.
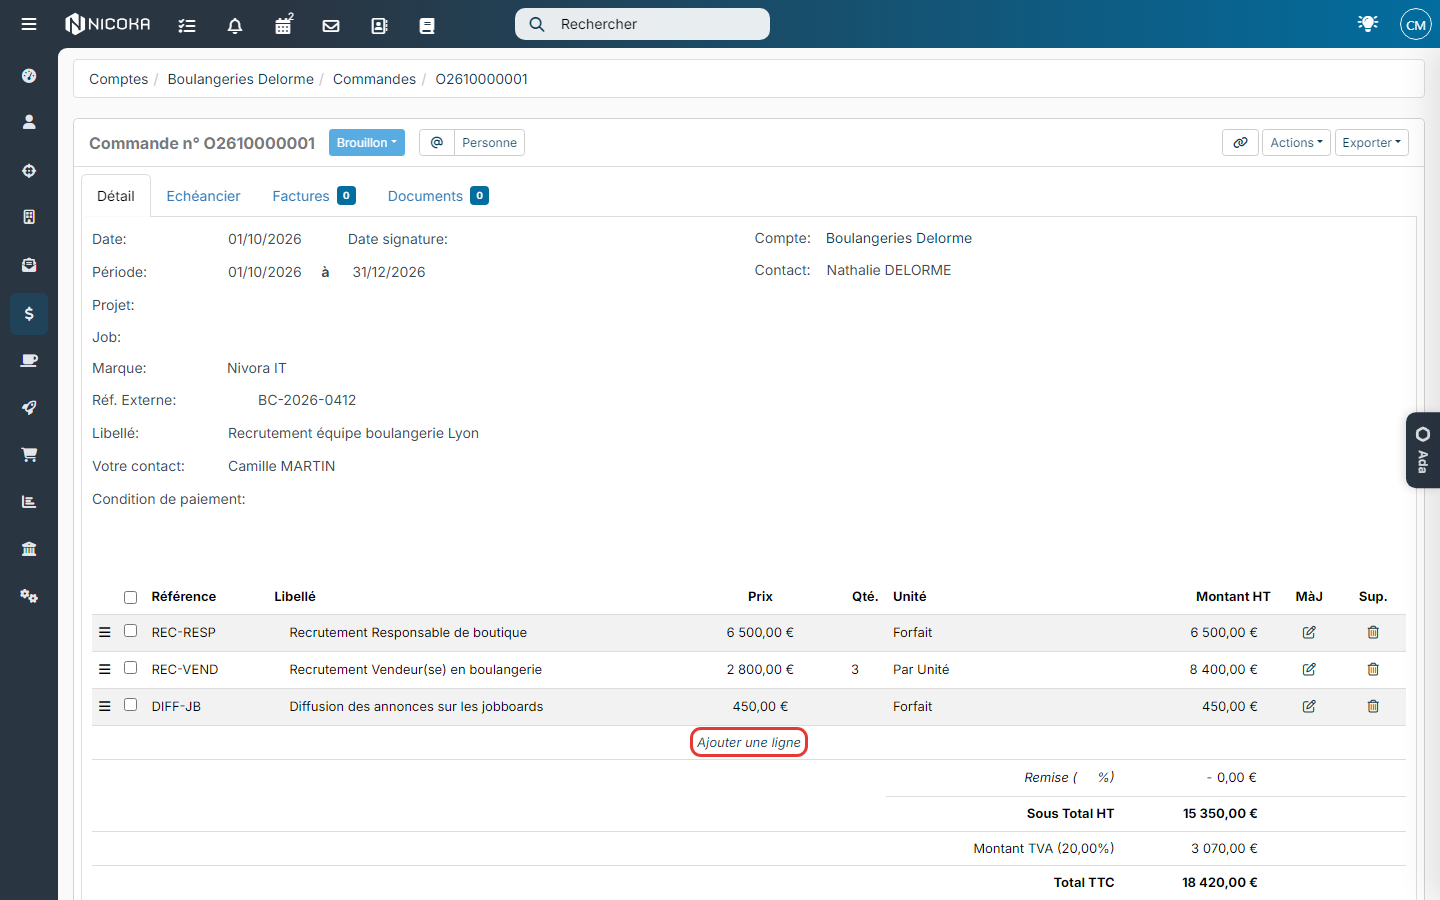
- Open the order and click Add a new row, just below the list of rows.
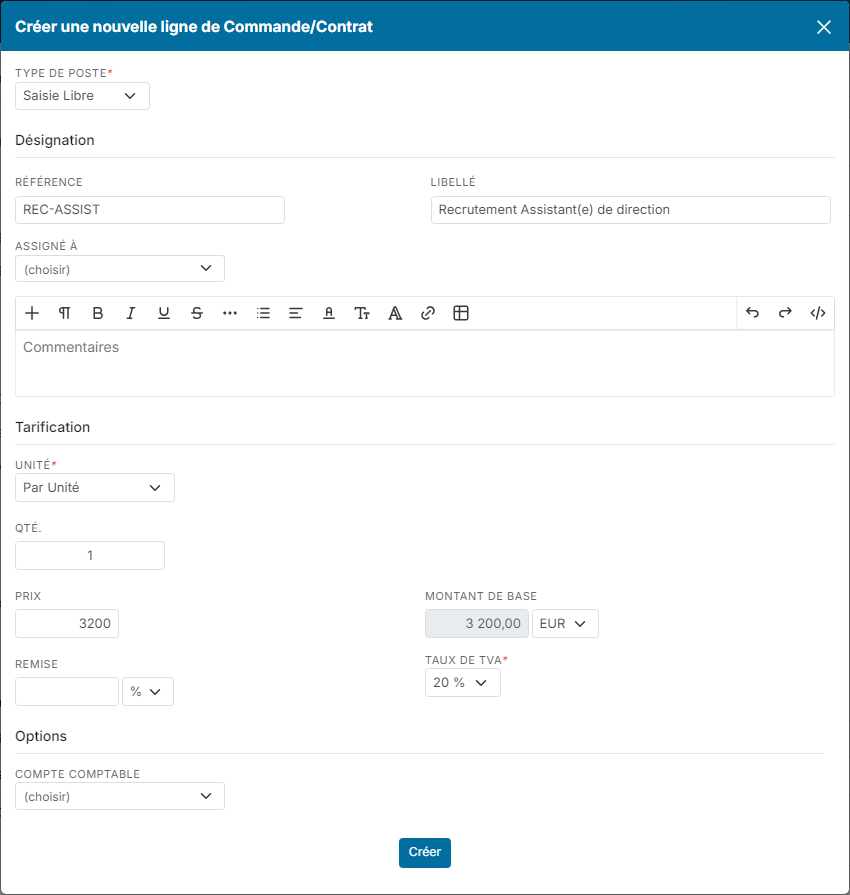
- Choose the Item Type:
- Standard: you enter the reference, the label and the price yourself;
- Product/Service: you pick a product or a service from your catalogs;
- Comments: a text row, with no amount;
- Chapter: a heading to group several rows.
- Under Description, fill in the Reference and the Label of the row. You can add a longer text in Comments.
- Under Pricing, choose the Unit. With Flat Rate, only the price is asked. With a unit such as Per Item, also enter the Quantity.
- Enter the Price, an optional Discount (as a percentage or an amount) and the VAT Rate. The Base Amount is calculated automatically.
- Click Create. The row appears in the order and the totals are updated.
3. Edit, reorder or delete rows
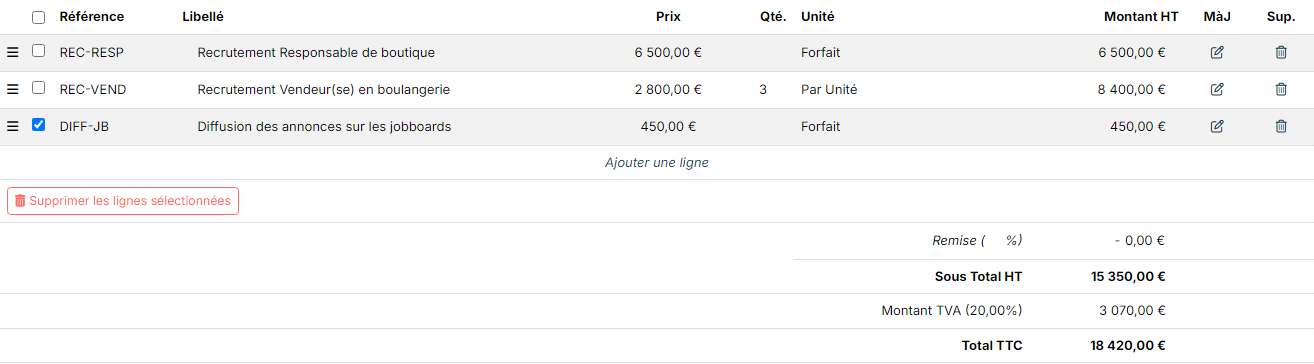
- Edit a row: click the pencil icon in the Upd. column, correct the information, then click Update.
- Delete a row: click the bin icon in the Del. column.
- Delete several rows: tick them, then click Deleted selected rows.
- Change the order of the rows: drag a row by the three-line icon on its left.
4. Move the order forward
Click the status shown next to the order number to move the order to the next step of its workflow. The steps offered depend on your company's settings.

I cannot see "Add a new row"
The Add a new row link and the edit icons are hidden in these cases:
- the order is closed: it has reached a final step of its workflow (closed, cancelled or signed, depending on your settings). In the workflow shipped with Nicoka, this is the case of the Validated status. Its rows can no longer be changed: see below to reopen it;
- your profile is not allowed to update orders: ask your company's Nicoka administrator;
- the order type is set up without rows: for this type, the order only has a header and no rows are displayed.
A row copied from a quotation may also be only partly editable.
Change an order that is already validated (sales and purchases)
When your customer (or your supplier) adjusts an order you have already validated, move it back to its first status so that its rows can be changed again. The steps are the same for a customer order and for a purchase order.
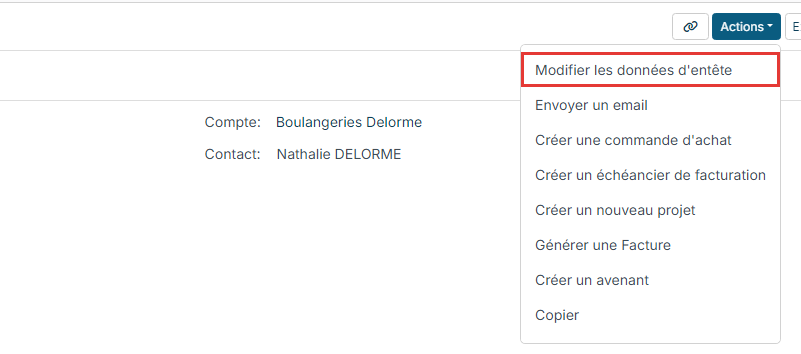
- Open the order, click Actions at the top right, then Change Header Data.
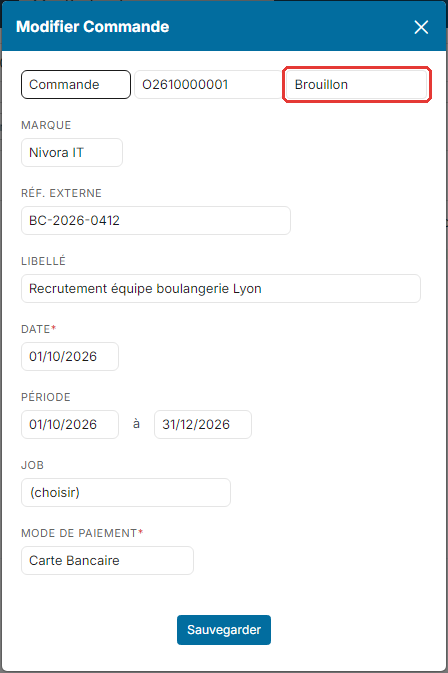
- At the top of the window, to the right of the order number, choose the Draft status (or the first step of your workflow), then click Save.
- The Add a new row link and the edit icons are available again: adjust the rows.
- Move the order back to Validated by clicking the status shown next to its number.
Prevent this reopening. If you do not want your users to change a validated order, remove, in their access profile, the update right on the Status field of orders (see Define access profiles in Nicoka). On a customer order, a status change through this window is then refused. On a purchase order, the Change Header Data action is no longer offered.