Job requests: get a recruitment approved before creating the job
Job requests let you get a recruitment approved before the job is created. An employee enters a request, the request goes through an approval workflow (their manager, then HR for instance), and the job is created automatically once the last approval is given. Until it is approved, the request does not appear in your jobs.
Where to find job requests
- My Job Requests: your own requests, to create and follow up.
- Job Requests: all the requests you are allowed to see, with the requester and the status of each one.
Both entries are in the Recruitment menu by default; your menu may be organised differently. Access to them and the right to create a request depend on your profile. If you cannot see them, ask your Nicoka administrator or our support team to enable them.
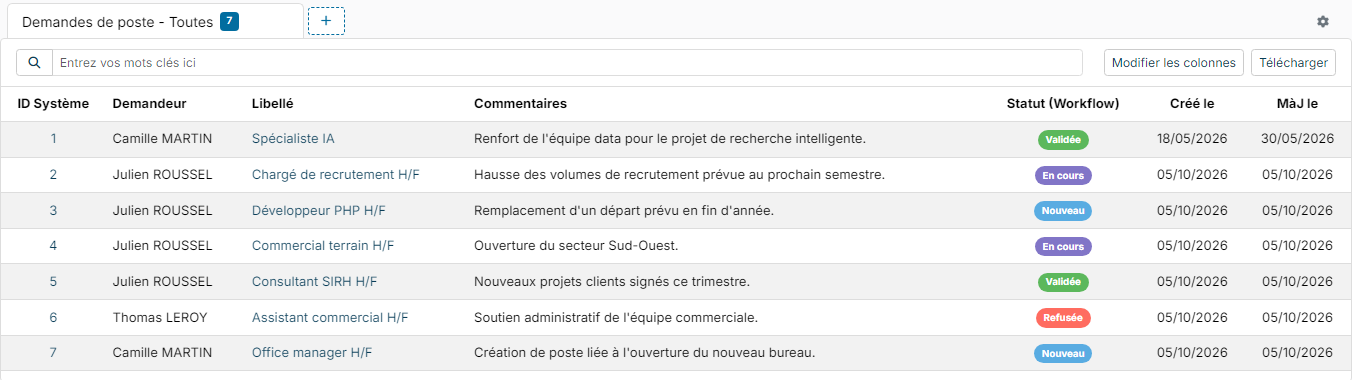
The status shows where each request stands:
- New: the request is saved but not yet sent for validation;
- Processing: it is going through the approval workflow;
- Validated: every step is approved and the job has been created;
- Refused: an approver has refused it.
Create a request
- Open My Job Requests and click Create a new request. To start from an existing request, use Create by copy instead.
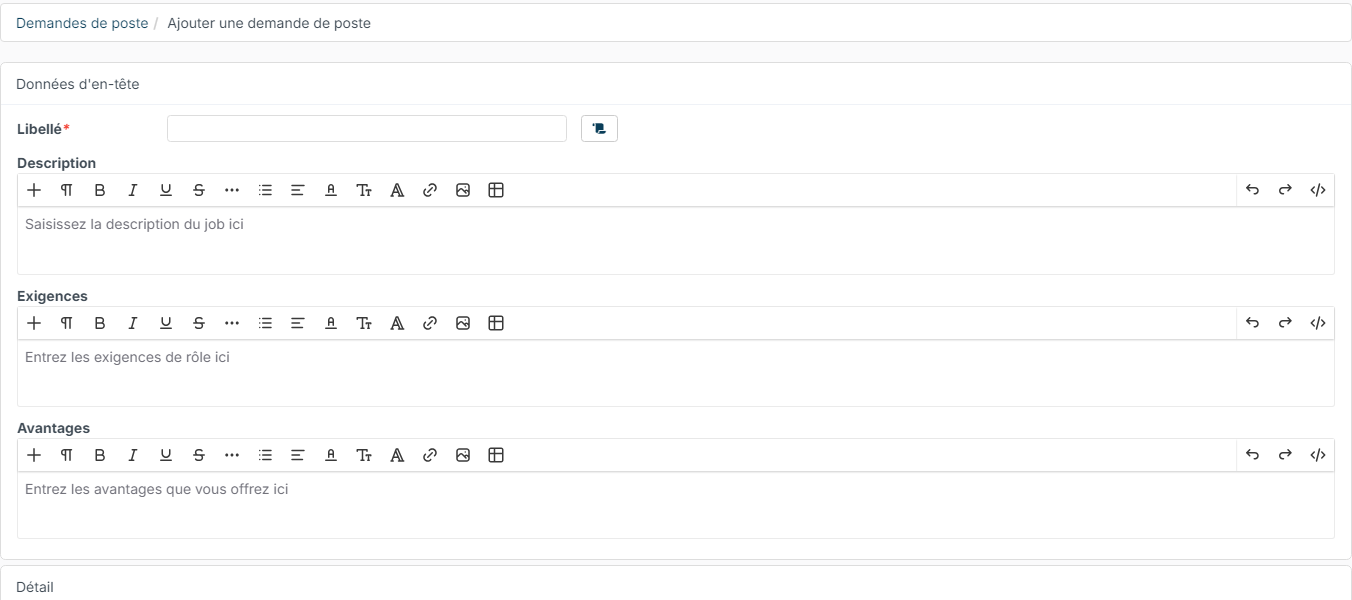
- Fill in the form, as you would for a job:
- Header Data: the Label (required), the Description, the Requirements and the Benefits. The button to the right of the label fills the form from a job template;
- Details: the contract type and duration, the salary, the start date, the number of open positions…;
- Requested by: the location, department and company, prefilled from your record;
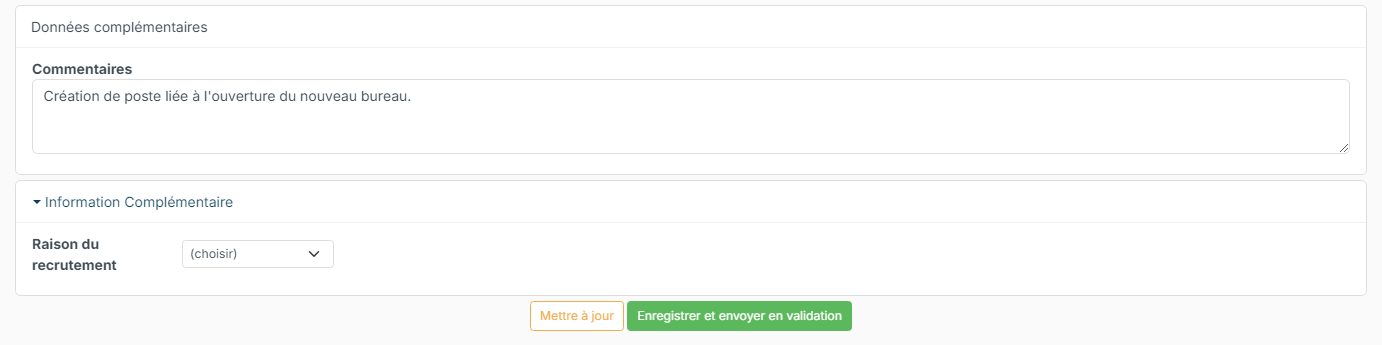
- Request additional information: your Comments, for instance the reason for the recruitment;
- the custom fields your company has added, if any, at the bottom of the form.
- Click Create. The request is saved with the New status: it has not been sent yet.
Create a request from an opportunity
When an opportunity leads to hirings, create the job requests straight from the opportunity:
- On the opportunity, open Actions and click Create a new request.
- The form opens with the Customer and the Opportunity already filled in, in the Requested by block. Complete it as any other request, then click Create.
The Requests tab of the opportunity lists its requests with their status. Once a request is validated, the job it creates carries the opportunity and shows in the jobs tab of the opportunity.
The tab and the action are enabled per opportunity type: in the opportunity types settings, tick Enable the Job requests tab on the relevant types. An existing request can also be linked to an opportunity from the Opportunity field of its page.
Send the request for validation
On the request, click Save and Send for validation. The Update button saves your changes without sending the request.
Nicoka picks the approval workflow that applies to you and alerts the approvers of the first step by email and notification. If several workflows are open to you, the Send for validation window first asks which Workflow to follow, for example with one, two or three steps: the approvers to fill in are those of the chosen workflow. Only the requester can edit their request; once sent, it can no longer be edited while it is being approved.
If the workflow has Manual steps, a Send for validation window opens with one field per step, named after the step (for example Validation 1, Validation 2). Pick the approver of each one among the active employees, then confirm. Each person is asked in turn, when the request reaches their step. If you pick the same person for two consecutive steps, their approval covers both.
If sending fails with a message saying that no approver was found, check that your manager is filled in on your employee record, or contact your administrator.
Approve or refuse a request
Approvers find the requests waiting for them in My Team > A valider, together with all their other pending approvals (time off, expense reports…). Each row offers three buttons: view the request, approve it or refuse it.

On the request itself, the Validation History block shows the current step and the expected approver, with the Approve and Refuse buttons.

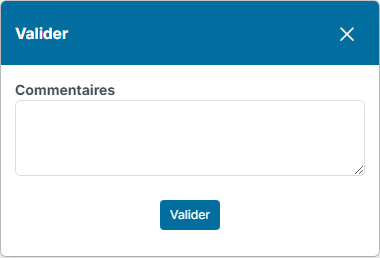
- Approve moves the request to the next step. If the step is set up with comments, a window opens for your Comments.
- Refuse asks for a Reason, which is required and shown to the requester in the history.
When a step has several approvers, the approval of one of them is enough to move to the next step. If the same person has to approve two steps in a row, the second one is approved automatically.
After validation: the job is created
When the last step is approved, the request moves to Validated and the job is created automatically. It takes over the request's information: label, description, requirements, benefits, contract, salary, location, department, account, project… The request's comments are added as a note on the job.
On the request, the Show the Job button opens the created job (the button uses the name your company gives to jobs). The validation history keeps track of every step.

If the job is deleted later on, the request can be reopened and sent for validation again to create a new job.
If the request is refused
The request moves to Refused and the reason appears in the validation history. The requester can edit it, then click Save and Send for validation again: the request starts over from the beginning of the workflow.

Print a request
When a document template exists for job requests, a printer icon appears at the top of the request: pick the template and the PDF opens in a new tab. Only the templates available to you are listed.
To create the template (administrators), follow PDF, DOCX template and choose the Request entity. To show the approvals, add a table on Workflow - Validation history: one row per sending, approval or refusal, with the step, the action, the author, the date and the comment.
Set up the approval workflows (administrators)
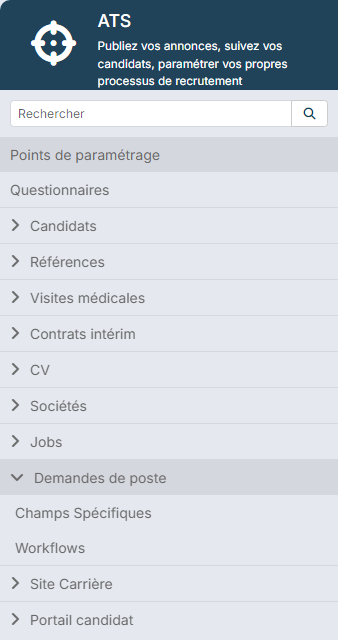
In the side menu, open Customizing > Store, then click Customize on the ATS card. In the left-hand column, expand Requests:
- Workflows: your approval workflows and their steps;
- Custom fields: the fields specific to your company, added to the request form (reason for the recruitment, person replaced, budget…), grouped in sections.
The Workflows page lists each workflow with its steps below it. The Include column shows who the workflow applies to, and the Assign To column shows who approves each step. To let the requester choose their workflow when sending, open several workflows to them (for example a one-step and a three-step one): the sending window offers them.
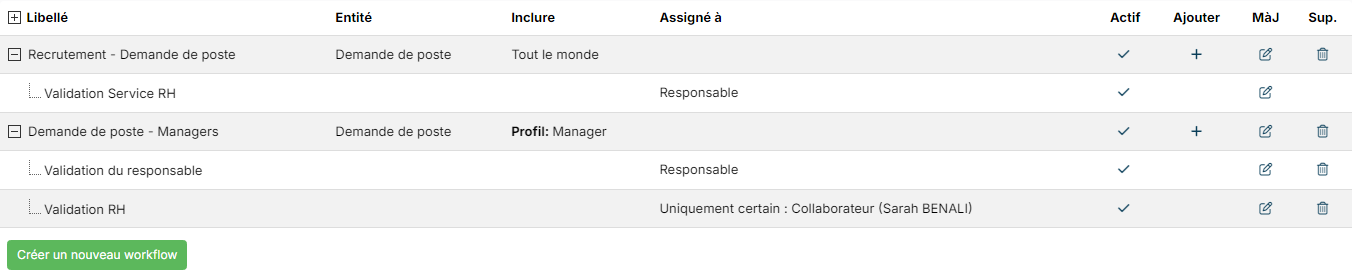
A standard workflow is provided, Job request. It has a single step, HR validation, assigned to the requester's Responsible, that is their line manager as set on their employee record. Despite its name, this step is therefore not approved by HR: edit it or add your own workflow to match your organisation.
Create a workflow
- Click Create a new workflow.
- Enter the Label.
- In Include, choose Everybody, or Only some people to keep the workflow for some requesters: departments, locations, employees, a company or profiles.
- In Actions on each step approval, add an action to keep the requester informed: they are told as soon as a step is approved and their request moves on to the next one. The standard email template Workflow for approval - Step approved gives the approver, their comment and the current step. Nothing is sent when the requester approves a step themselves.
- In Actions on final approval and Actions after final refuse, add an action to inform the requester: Send an email or Send a notification, with the template to use. The standard workflow has none: add them if your requesters should be told about the decision.
- Leave Active ticked and save.
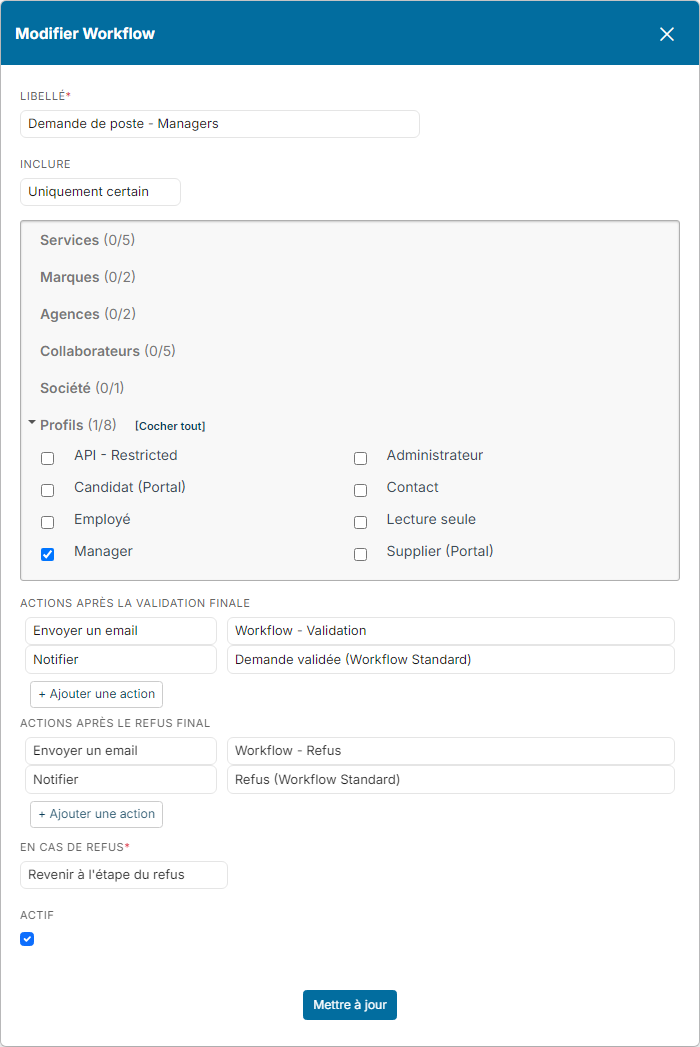
When several workflows are active, Nicoka uses the one that targets the requester (Only some people) before a workflow open to Everybody. You can therefore set up one workflow per population. For instance:
- managers and recruiters: approval by the manager, then by the N+2 manager, then by HR;
- directors: approval by HR only.
If no workflow applies to the requester, sending for validation is refused with a message asking them to contact their administrator.
Add and set up the steps
On the workflow row, click + to add a step, and the edit icon to change an existing step. Steps follow the order of the list; drag them to change that order.
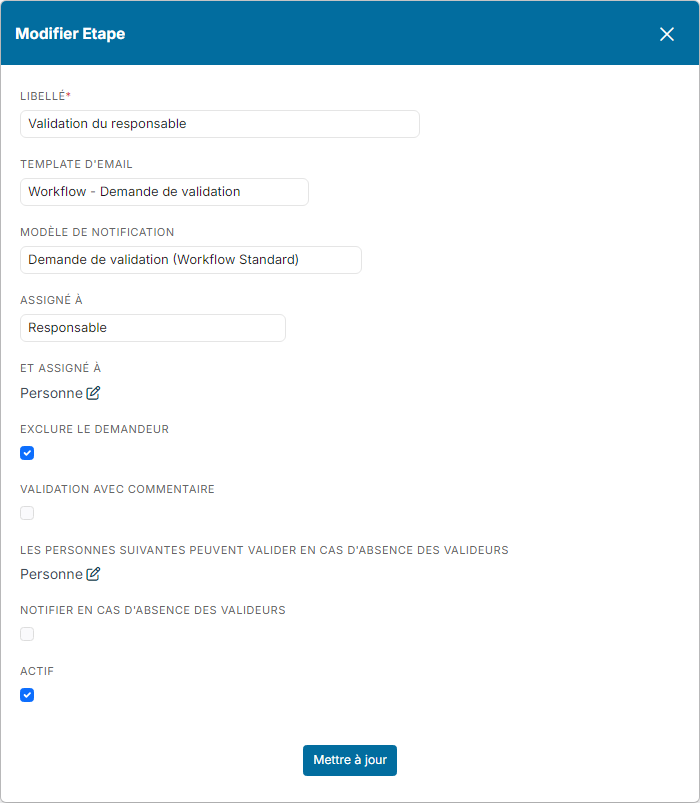
- Label: the name of the step, shown in the validation history and in the approval list.
- Email Template and Notification Model: the message sent to the step's approvers when the request reaches it.
- Assign To: who approves the step.
- Responsible: the requester's line manager (N+1);
- Responsible N+2: their manager's manager;
- HR Responsible: the HR manager set on the requester's record;
- Operational Manager: their operational manager;
- Only some people: the people you tick, or the members of the departments, locations or profiles you pick.
- Manual: the requester picks the approver of the step when sending the request, one approver per Manual step of the workflow. With Exclude Requester, they cannot pick themselves for that step.
- Also Assign To: extra approvers for the step, for instance a given person in HR on top of the manager.
- Exclude Requester: removes the requester from the step's approvers. Without this option, a step whose approver is the requester themselves is approved automatically, for instance for a manager who is their own manager in Nicoka. With this option, if the requester is the step's only approver, sending is refused.
- Approve with comments: opens a comment window when the approver clicks Approve.
- The following people can validate…: substitutes, who can approve or refuse the step instead of the approvers. Tick Notify in case of absence so that they are alerted when all the step's approvers are absent that day.
- Active: untick it to disable a step without deleting it.
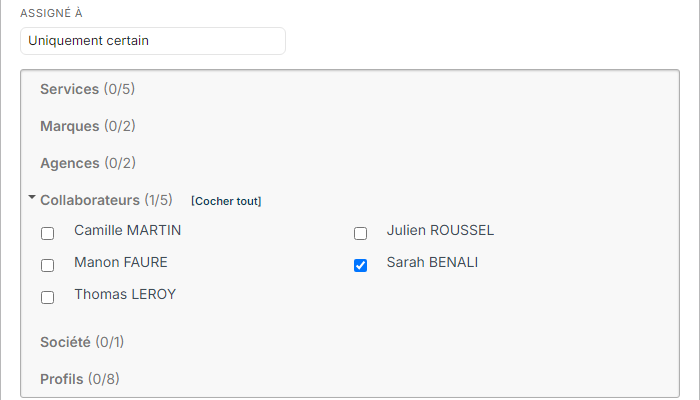
Choose who the job is assigned to
In the ATS customizing, open the customizing points, section Requests. The Validated Job assign to point sets who the created job is assigned to: Validator (by default, the person who gave the last approval) or The following, to pick the people.

To create a job straight away, without prior approval, see Step 5 - Create a position or assignment.