Push Candidates and Push Jobs
The push lets you send the same email in one go, personalized for each recipient:
- the candidate push presents to your customers and prospects candidates from your talent pool that you want to place, even if they match none of your current jobs;
- the job push presents your current openings to candidates from your talent pool, to revive jobs that receive few applications and keep in touch with them.
Good to know before you start
- One email per recipient: each recipient gets their own email; nobody sees who else the message was sent to.
- 500 recipients maximum per push. Beyond that, Nicoka shows "Too many recipients" and asks you to narrow your selection. Beyond a few recipients, emails are sent in batches, in the background.
- People in copy: if you add people in copy (Cc link of the Email step), for example your colleagues, they do not receive every email: they receive a single recap, whose subject starts with "[Push Recap]", listing the recipients.
- Opt-outs: contacts and candidates whose Has opted out of email box is ticked, or who have no email address, receive nothing. Nicoka warns you at the Email step.
- Mailbox: the push is sent through your mailbox connected to Nicoka. If you have none, Nicoka asks you to set one up: see Step 3 - Connect your email account.
1. Prepare your templates
The push email contains two parts: your introduction text and the formatted list of the candidates (or jobs) pushed. Nicoka provides a template for each.
List templates
The list template defines the information shown for each candidate or each job in the email.
- In the side menu, open Customizing > Store.
- On the ATS card, click Customize.
- In the left-hand menu, expand the Candidates (or Jobs) section, then click List Templates.

The templates provided are called [Model] - Push candidat listing and [Model] - Jobs listing. Edit them with the pencil icon, or create your own. The candidate template does not show the candidate's name: only their reference is given to the customer, so that they can easily point the candidate out to you.
Email templates
Nicoka also provides two email templates:
- [Model] - Push candidates, linked to contacts, for the candidate push;
- [Model] - Push Job opportunities, linked to candidates, for the job push. It includes an unsubscribe link: we advise you to keep it.
You find them with your other Email Templates: you can adapt them or create others (see Manage Email Templates). If you edit them, keep the list template in the body of the email. Add the "Signature" tag at the end of the email so that your signature is inserted when sending.
Personalize the email for each recipient
Each recipient gets their own email: the tags of the template (for example the contact's Civility, First name or Last name) are replaced for each of them when sending. To greet your contacts by name, insert these tags in an email template linked to contacts (to candidates for the job push), then pick it at the Email step. You can then edit the text: the tags stay in place.
In the push window, the / command of the message inserts your own sender details (first name, last name, email, phone, booking link), not the recipient's.
Default template
- In the ATS settings, open Customizing Points, then expand the Customizing Push section.
- Choose the template to offer in Push of candidates (Email) and in Push of Positions (Email).

Without a default template, you pick the template at each push, at the Email step.
2. Candidate push
Choosing the recipients
- Open your contact list (CRM menu), apply a variant if needed, then tick the contacts to send the push to.
- Click Actions > Push Candidates.
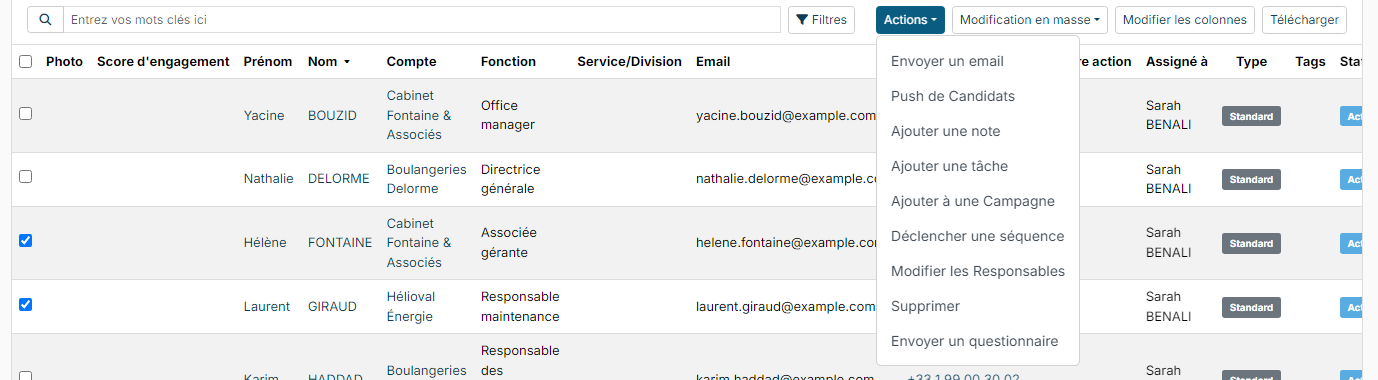
The push window opens. It has three steps; the Previous stage button takes you back at any time.
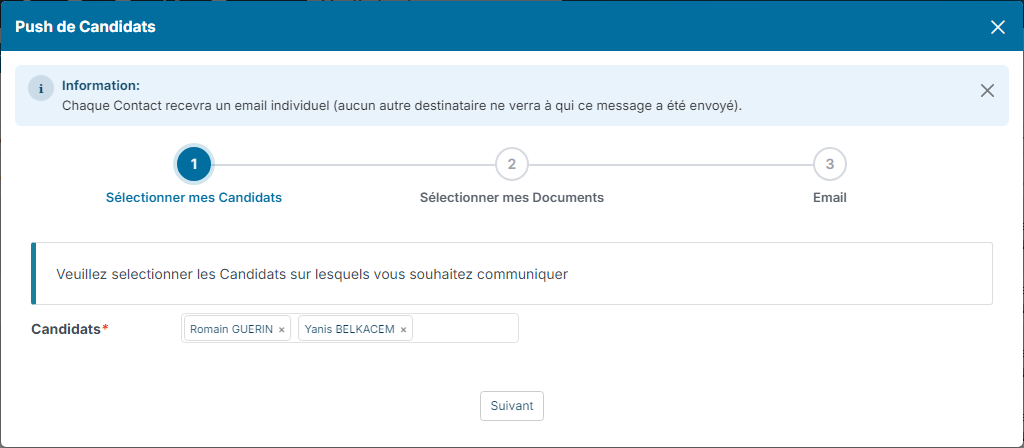
Step 1: Select my Candidates
In the Candidates field, type the name of the candidates to present and pick them in the list, then click Next.
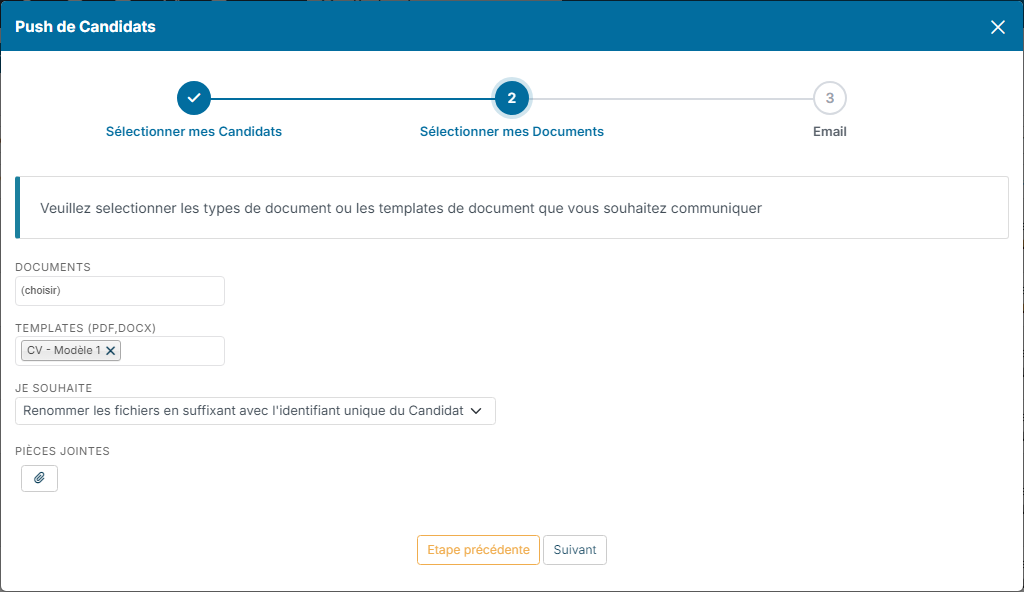
Step 2: Select my Documents
This step is optional: you can go straight to the next one. You can attach to the email:
- the candidates' Documents, by type (for example the resume);
- documents generated from your PDF / DOCX templates, for example an anonymized resume;
- your own files, with the paperclip button of Attachments.
The I want to list sets the name of the attached files: Keep original filename, Rename using first and last name (not advised if you want to keep the candidate anonymous), Rename using first name only or rename using the candidate's id. Click Next.
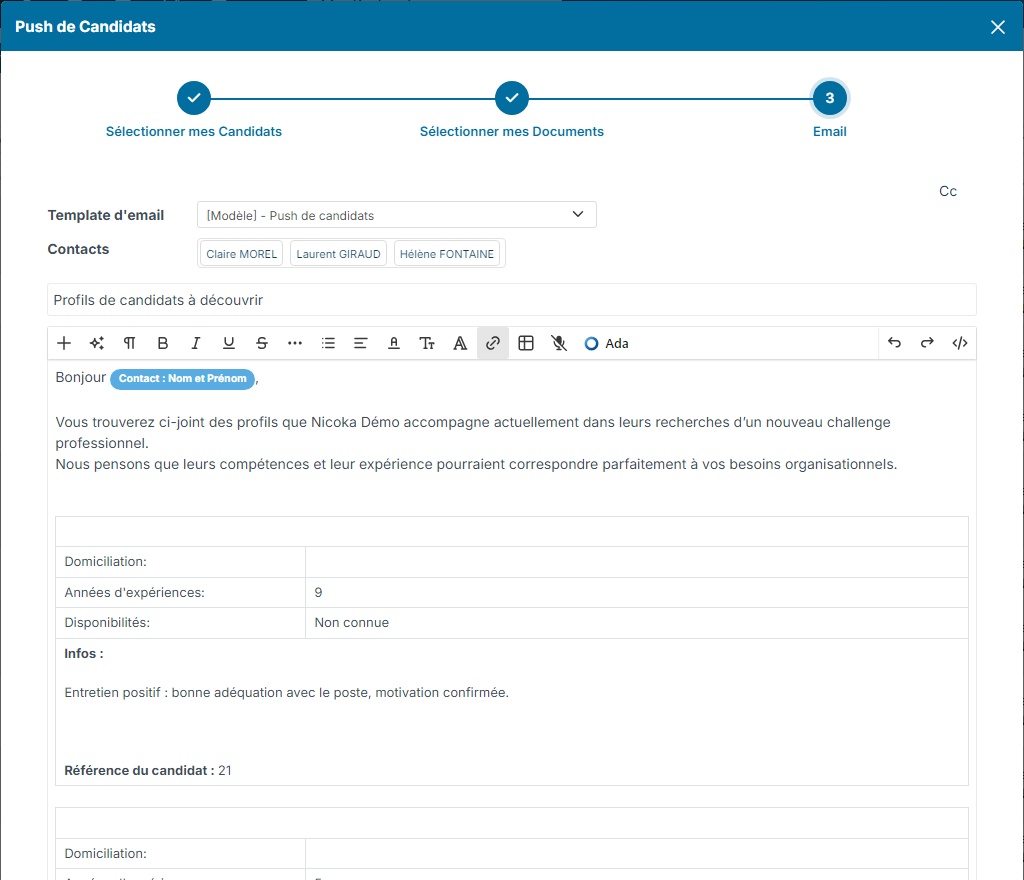
Step 3: Email
- Choose the Email Template if the default one does not suit you. The subject and body are filled in, with the list of the chosen candidates; you can edit them.
- Check the recipients, shown under Contacts. The Cc link lets you add people in copy, who will receive the recap.
- If you wish, pick a Next Action to schedule your follow-up.
- Click Preview to receive the email in your own mailbox and check how it looks.
- Click Send. The arrow next to the button offers Send Later, to schedule the sending.

The push is logged in the action history of each candidate presented, and the candidates are added to the proposed candidates of each contact.
3. Job push
Choosing the recipients
The job push can be started from several screens:
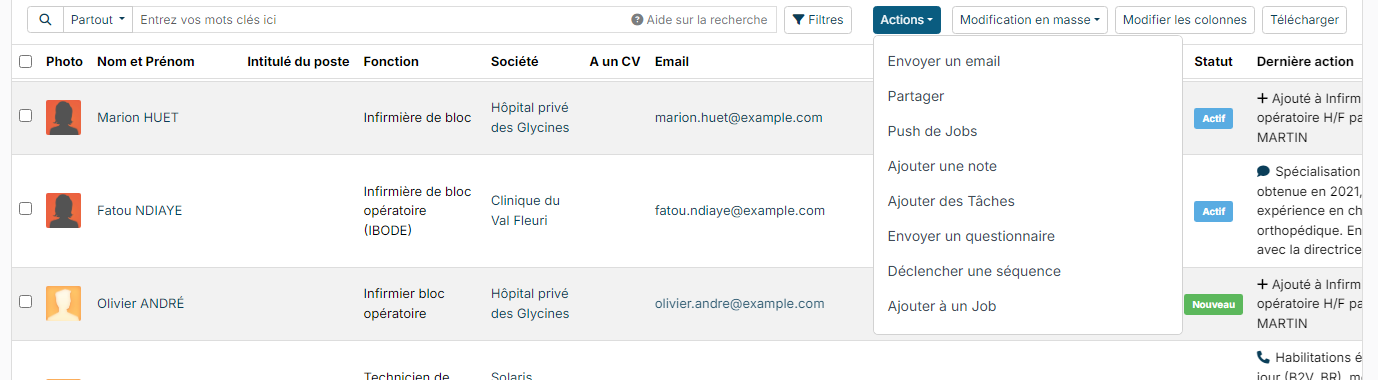
- the candidate list (Recruitment > All Candidates menu): apply a variant if needed, tick the candidates, then click Actions > Push Jobs;
- a job's pipeline: tick candidates of a step, then choose Push Jobs in the Actions menu;
- a candidate's sheet, to send jobs to that candidate only.
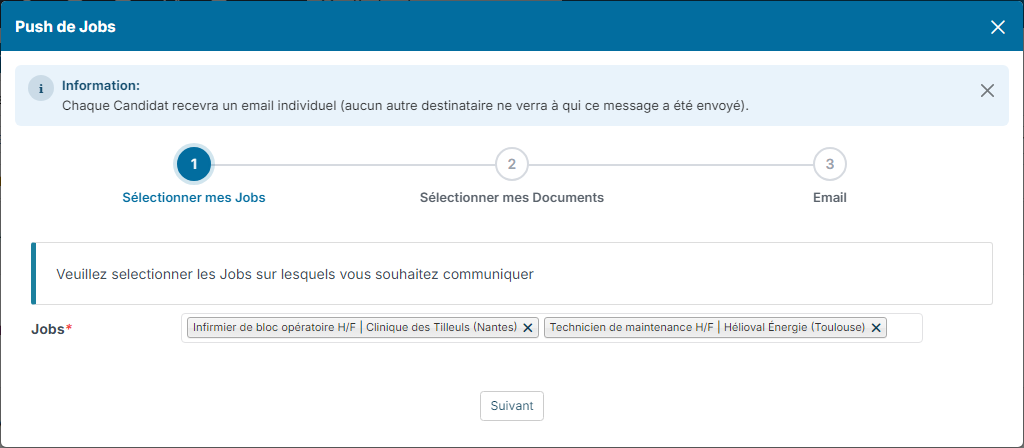
Step 1: Select my Jobs
In the Jobs field, pick the jobs to present, then click Next.
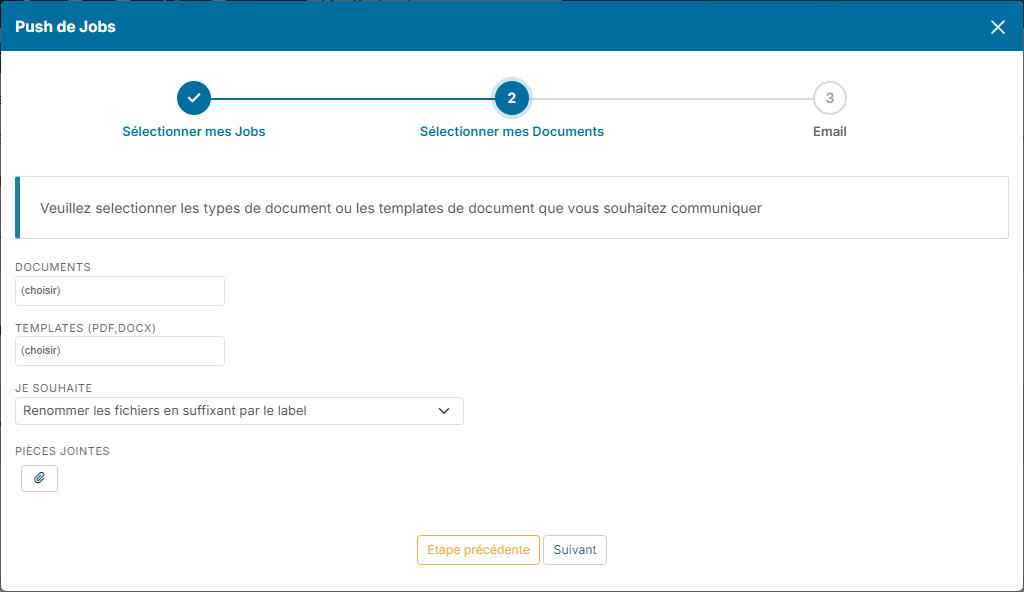
Step 2: Select my Documents
As for the candidate push, this step is optional: job documents, documents generated from your PDF / DOCX templates and Attachments. The I want to list offers here Keep original filename, Rename by suffixing with the label (the job title) or rename using the job's id.
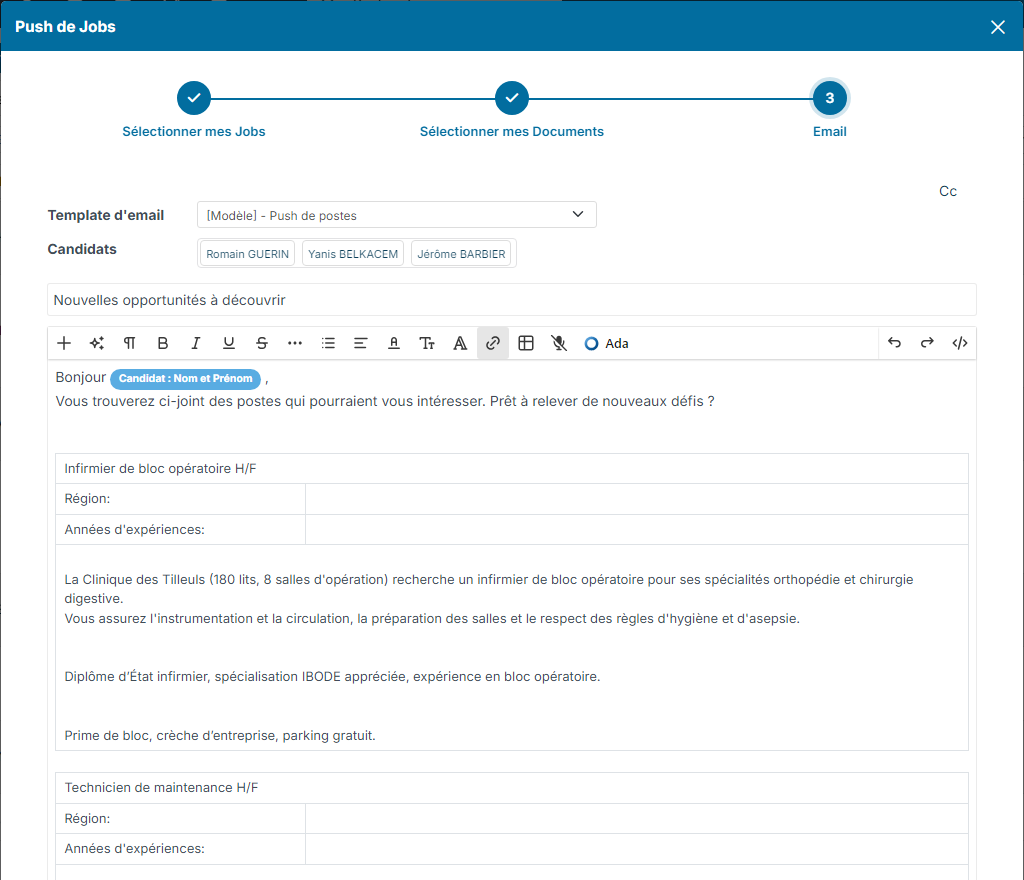
Step 3: Email
It works as for the candidate push: choose the Email Template, check the recipient Candidates, add people in Cc if needed, then click Preview and Send.
The push is logged in the action history of each candidate, and the jobs sent are added to the proposed jobs of their sheet.