Connect your DocuSign account
Nicoka can have your documents signed electronically, with its own signature, Nicoka Sign, or with the provider of your choice. If your company uses DocuSign, connect it to Nicoka so your signature requests go through your DocuSign account. The connection is set up once, by an administrator.
Step 1 — Create the DocuSign service
- In the side menu, open Customizing > Store.
- On the Documents card, click Customize.
- In the left-hand menu, click Third party services.
- Click Create a new third party service.
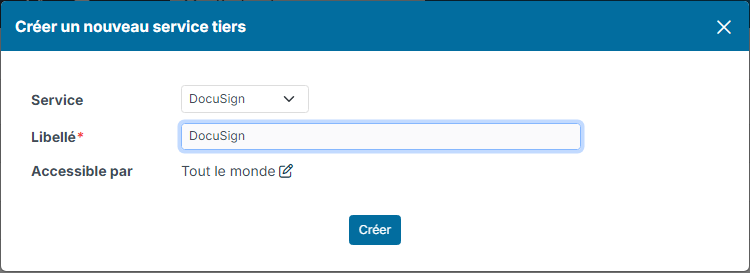
- Choose the DocuSign Service and enter a Label, for example "DocuSign".
- In Available for, you can restrict the service to some of your users (by company, department, location, profile or employee). By default, everyone can use it.
- Click Create.
Step 2 — Connect your DocuSign account
- On the DocuSign service row, click the gear in the Customize column.
- Click Connect My docusign Account.
- You are redirected to DocuSign: log in with your DocuSign account and allow Nicoka's access.
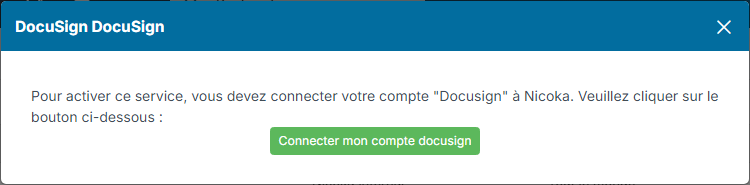
Back in Nicoka, the message Your … account is now connected to Nicoka appears. The service is activated automatically: the tick appears in the Active column.
If you then reopen the gear, you see the connected DocuSign account. The ReConnect My docusign Account button lets you connect again, for example if you change DocuSign account.
What's next?
To send a document for signature, see Sending documents and requesting a read receipt or signature. To connect Yousign rather than DocuSign, see Adding your Yousign account. To email the author of a document once every signature is collected, see Get an email when a document is signed.