Sequences in the CRM: automate prospecting your contacts
Goals
- Prospect without forgetting anyone: a sequence chains your first messages and your follow-ups to your contacts.
- Combine channels: email, SMS, WhatsApp, LinkedIn invitation, message and InMail in a single sequence.
- Keep control: delays between steps, conditions, tasks for you, and a stop as soon as the contact replies, with a Has replied branch.
What is a contact sequence?
A sequence is a chain of steps that you build once, then apply to several people. It is aimed at one type of person, its target: Contact for the CRM, Candidate for the ATS, Employee. Sequences are set up in the same place for the whole suite, in Customizing > Sequences, and each module only offers the ones that match its target.
A reply does not stop the sequence on its own. To stop it as soon as the contact replies, place a Branch set to Has replied after each message, with the wait you want before the follow-up as its delay: the follow-up goes on its No branch, with a delay of 0, and the Yes branch stays empty. The Stop the sequence button in the contact's timeline stops it by hand.
Create a sequence for your contacts
- Open Customizing > Sequences, then click Create a new sequence.
- Enter a Label and choose the Target: Contact.
- Click Create: the editor opens.
The editor is the same as for the ATS: the Starting point is at the top and the steps follow one another from top to bottom. Click the + on a line to add a step, then click the step to set its content. Each step carries a delay in days from the previous step: 0 means "right away".
To reorganize the sequence, drag a step onto another +; a branch moves with its Yes and No paths, to the end of a path. When you hover over a step, Duplicate creates a copy right below it, and Copy this step and what follows copies the step with everything after it: then click a +, and Paste the copied steps. A copy that contains a branch is pasted at the end of a path.
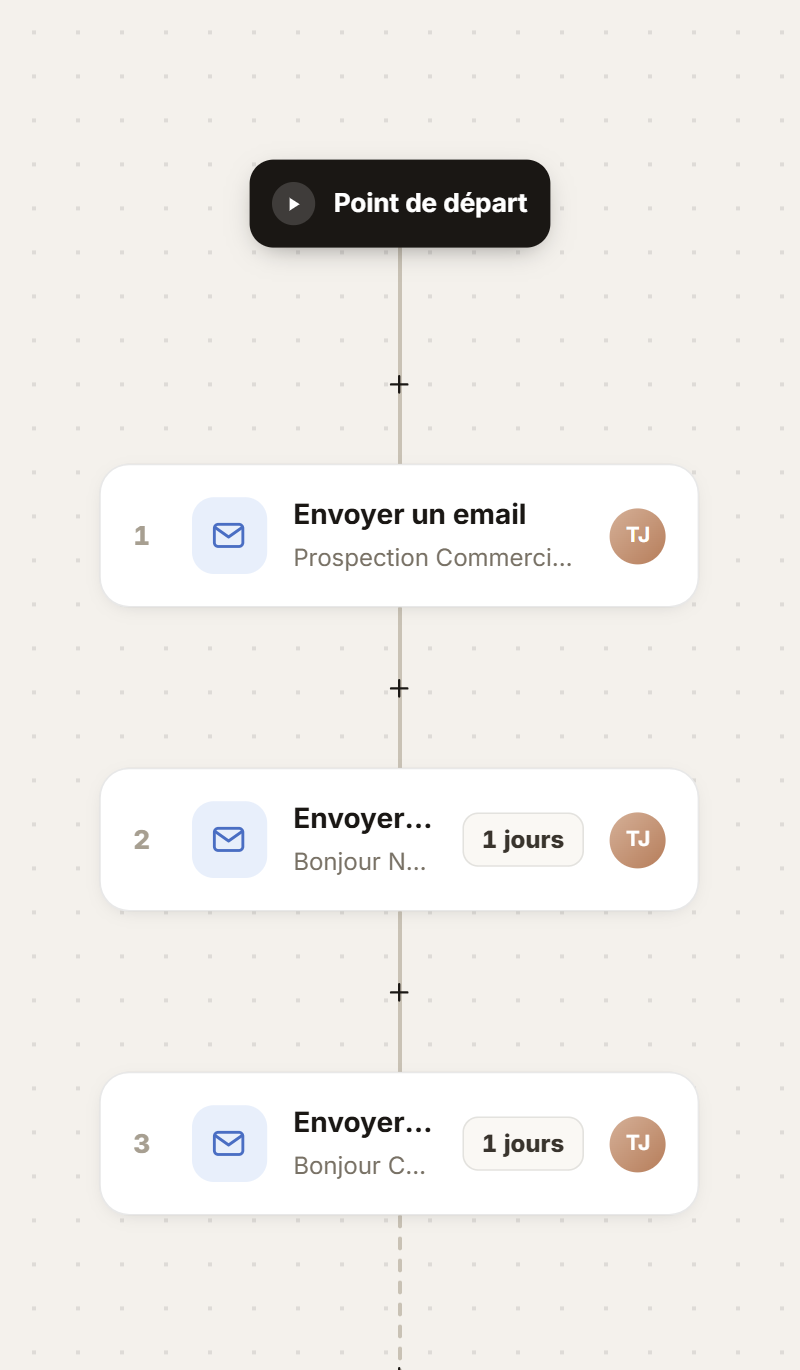
This example chains a first email, then two follow-ups one day apart.
Steps available for a contact
- Channels: Send an email, Send a SMS, Send a WhatsApp message, LinkedIn invitation (note of 200 characters at most), LinkedIn message (to your connections) and LinkedIn InMail.
- Logic: Wait, and Branch to follow a Yes or No branch depending on a success condition (for example Has accepted, Has replied, or a condition read on the record: Has an email address, Has a LinkedIn profile, Has a phone number).
- Other actions: Create a task, Webhook and Enrichment.
The recruitment steps, Change the process step and Disqualify the application, do not exist in a contact sequence: they belong to candidate sequences.
The LinkedIn message channel only writes to your connections: LinkedIn refuses it to a contact who has not accepted your invitation. Place it on the Yes branch of a Has accepted condition. To write to a contact outside your network, use the InMail.
Get notified when a contact accepts your LinkedIn invitation
The Create a task step creates a task on the record of the enrolled person. Placed after a condition, it lets you know at the right moment, for example when a contact accepts your invitation.
- Add a LinkedIn invitation step.
- Then add a Branch on the Has accepted condition.
- On the Yes path, add the Create a task step and fill in its Task title (for example "Invitation accepted: follow up") and its Type of task.
- In Assign to, choose Person who starts the sequence or the contact's Owner.
- Tick Notify by email to also receive the assignment email.
The task appears in the contact's activities and in your tasks, with a notification when it is due. LinkedIn does not report the acceptance in real time: allow up to a few hours.
Contents accept variables to personalize each message: type / in the text or click a suggested variable. Each step is described in detail in Sequences in the ATS, and a complete LinkedIn example in Create a LinkedIn sequence and start it on your candidates.
Enroll contacts in a sequence
- Open CRM > Contacts and tick the contacts to enroll.
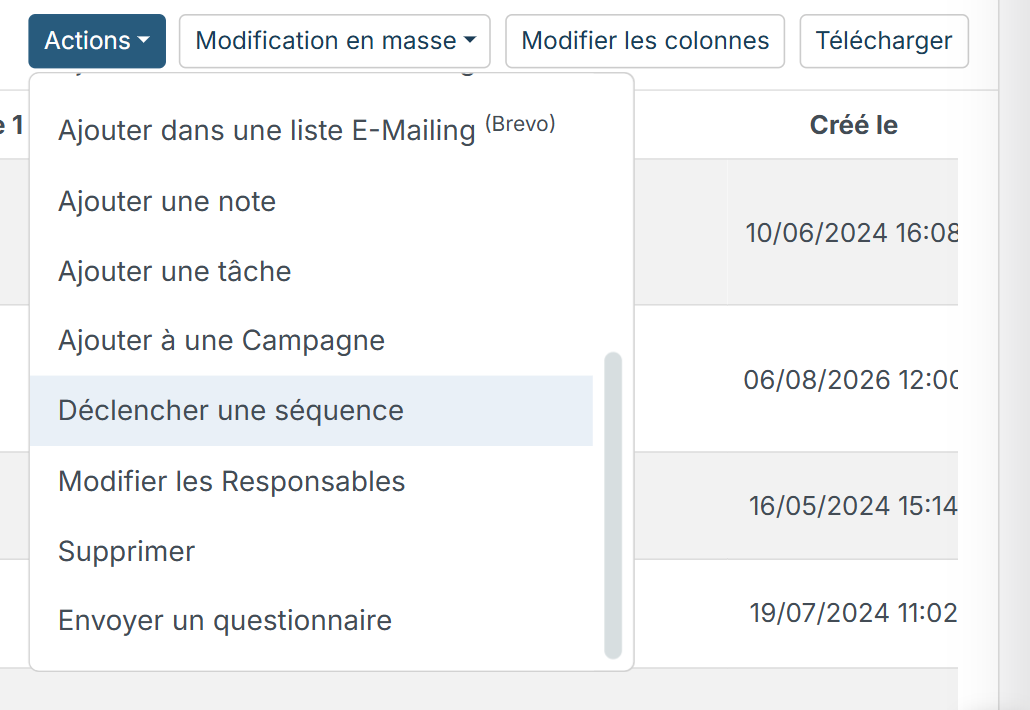
- Click Actions, then Enroll in a sequence.
- In the window, check the list of contacts, choose the Sequence and the Start On date, then click Start.
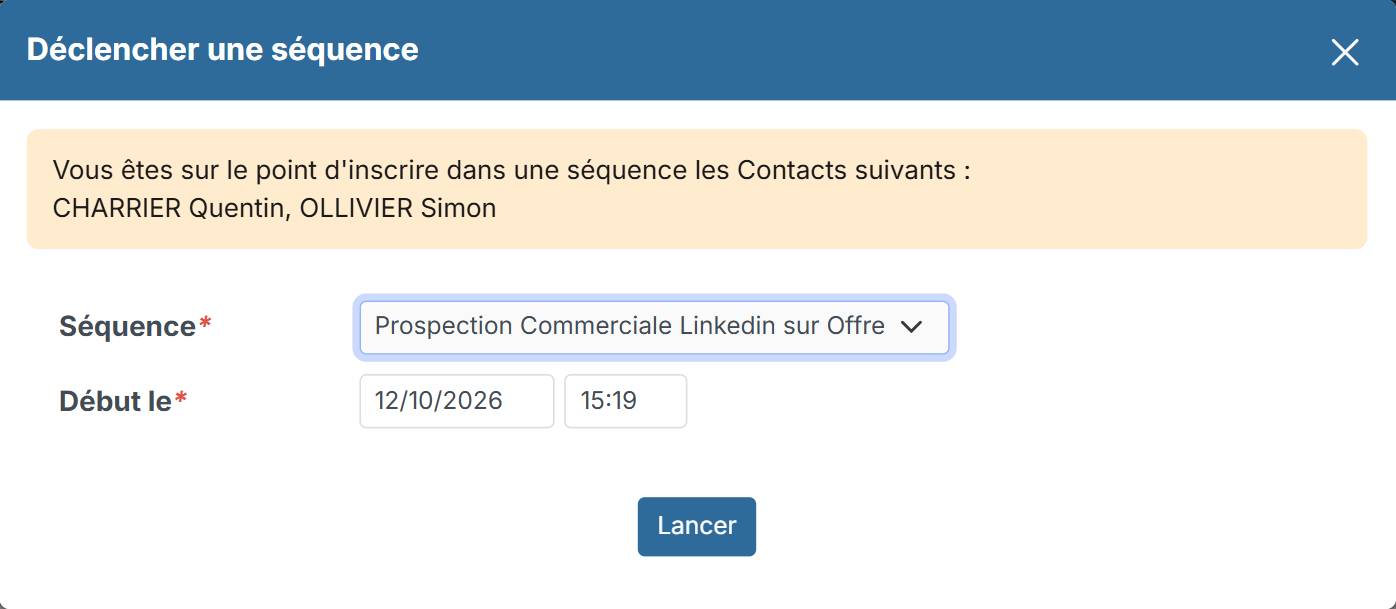
The list only offers sequences whose target is Contact. In the contact list, the Last Sequence, Sequence Step and Sequence Status columns are chosen through Edit Columns: they show at a glance where each contact stands.
From a campaign
Sequences can also start when a campaign target changes step, on a selection of targets, with the WhatsApp and LinkedIn channels. For the campaigns themselves (steps, targets, tracking), open CRM > Campaigns.
The sequence is chosen on the step of the campaign flow, in the Start the sequence field. A deactivated sequence (Active unchecked) no longer enrolls the contacts who enter the step: the field keeps it, marked (Disabled), and it enrolls the next contacts again once reactivated. The contacts already enrolled carry on: to interrupt them, open the sequence and click Actions > Pause the enrolled people.
Sending rules
Sends go out on your behalf and follow your account settings, in Customizing > Configuration: Sending start time, Sending end time and Days without sending (public holidays are excluded too). A step due outside these slots waits for the next opening. For LinkedIn and WhatsApp, your account must be connected in your Integrations.
Track a sequence
In the editor, the Actions menu offers Step Targets: for each step, the number of sends Sent, Not sent and Passed, with a rate, then the list of enrolled people with their step, their status and the date. The same menu lets you Duplicate the sequence and view the Change log.
Troubleshooting
- "This step will send nothing while its content is empty": open the step and write its content.
- "None of the steps of this sequence can be sent yet": enrolling a person would be refused. Add a step on an available channel.
- Your sequence does not appear in the list: check its target. Only sequences with the Contact target are offered for contacts.
- Nothing goes out: check the sending hours and days of your account, then the Step Targets screen.