Time management: entering, approving and setting up timesheets
The Time management module lets every employee enter, each month, the time spent on their projects, jobs and tickets, then send it for approval. Managers follow their team's timesheets, plan the workload and approve. This guide follows these three points of view, then the module settings. The screenshots show the French interface.
1. Entering your time
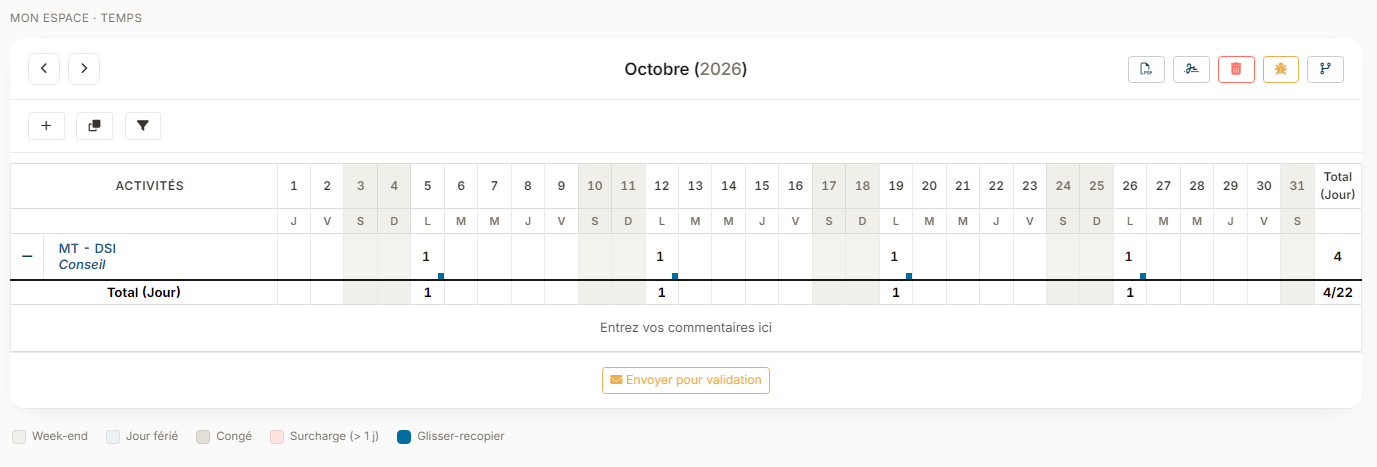
Open My HR Space > My TimeSheets. The timesheet of the month is displayed: one line per activity, one column per day. The arrows and the Today button change month.
Adding activities
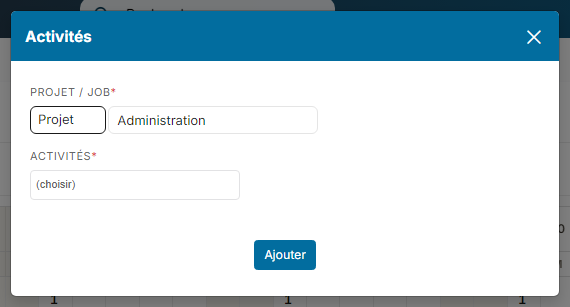
- The + button (Add a time line) opens the Activities window. Choose Project or Job, then the project or job, then the activity, and click Add. Only the projects and activities you have access to for the month are offered.
- The Paste last month's activities button restores the previous month's lines in one click.
- The Filter activities button narrows the display when the sheet has many lines.
- The − at the start of a line removes an activity from the sheet.
Entering time
- Click a cell and enter the time, in the unit of the activity: hours, days, half days, quarter days…
- To copy a value onto the following days, drag the small square at the bottom right of the cell (Drag to fill).
- The legend shows weekends, public holidays, leave and overloaded days (more than one day entered).
- You cannot enter time on an activity that has not started yet or that is closed at that date: a message tells you so.
- The comment area below the grid holds a comment on the month.
- If your manager planned your activity, this forecast appears in the sheet. The Save Forecast as Real button turns it into entered time.
Other actions on the sheet
The icons at the top right of the sheet give access to:
- Export: the month's sheet as a PDF, from a template (monthly activity report by default). The template can list the days without any time and group the lines by week: see Settings below.
- Send the timesheet for electronic signature, if a signature service is set up on your workspace. See Signing documents with Nicoka Sign. The Recipient field offers every address of the record: the request goes to the one you pick. In the request window, Refresh documents updates the documents and signers without closing it.
- Delete the timesheet.
- Add a correction, if corrections are enabled: it records an adjustment, for example overtime, on a period that is already closed.
- Change history of the sheet.
2. Sending your timesheet for approval
When the month is complete, click Send for validation. If days are missing, the window says so, with the detail day by day. Confirm with Send. If your company forbids sending an incomplete sheet, sending is refused until the missing days are entered.
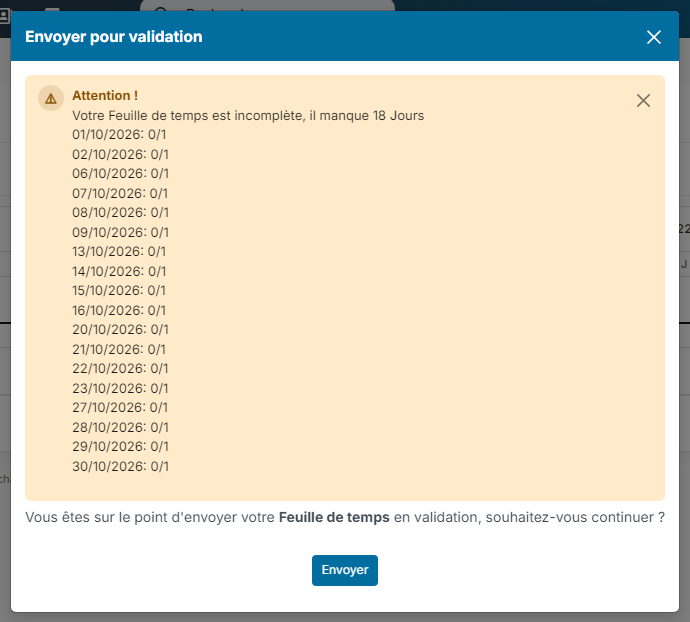
Once sent, the sheet can no longer be changed during approval. If it is refused, it becomes editable again: correct it and send it again. A validated sheet can only be reopened by the people named in the settings.
3. Following up and approving the team's time
The team's timesheets
My Team > TimeSheets lists your employees' timesheets, with the Actual/Expected column (in red when the sheet is incomplete) and the approval status. The Current month variant is limited to the current month.
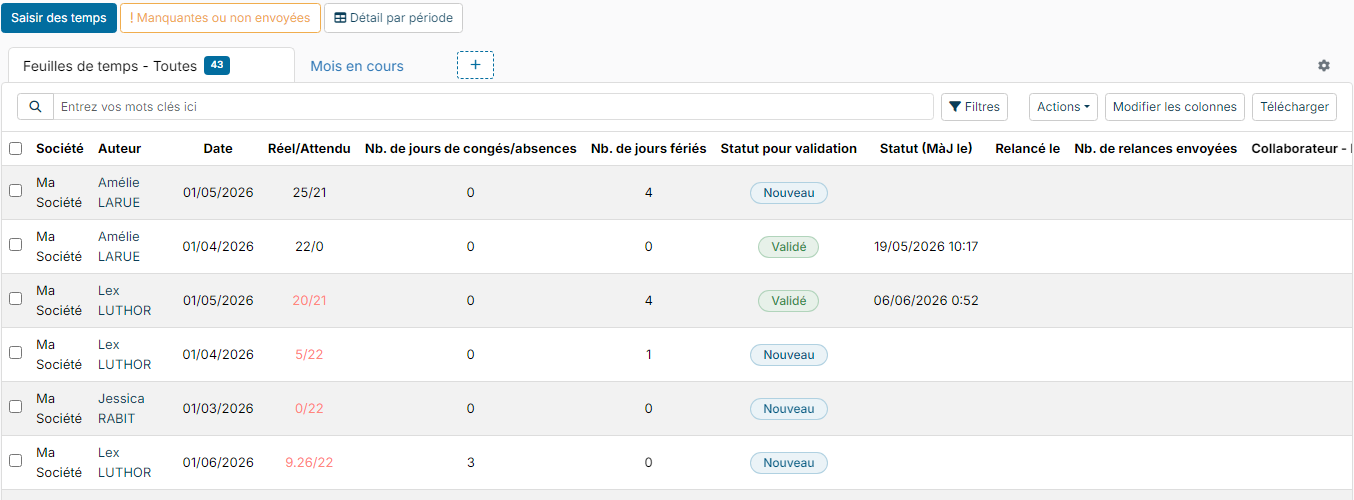
- Enter times opens an employee's sheet to enter time on their behalf, if your profile allows it.
- Missing or not sent spots the late sheets.
- Detail per period opens a report of the time entered over the chosen period, filterable by employee.
- Once sheets are ticked, the Actions menu offers Send a reminder (an email built on the reminder template), Force Validation depending on your rights, download and deletion.
Planning and staffing
My Team > Planning shows, for each employee, the actual and forecast time of the month, day by day. An employee's + lets you plan their activity: this forecast then appears in their timesheet.
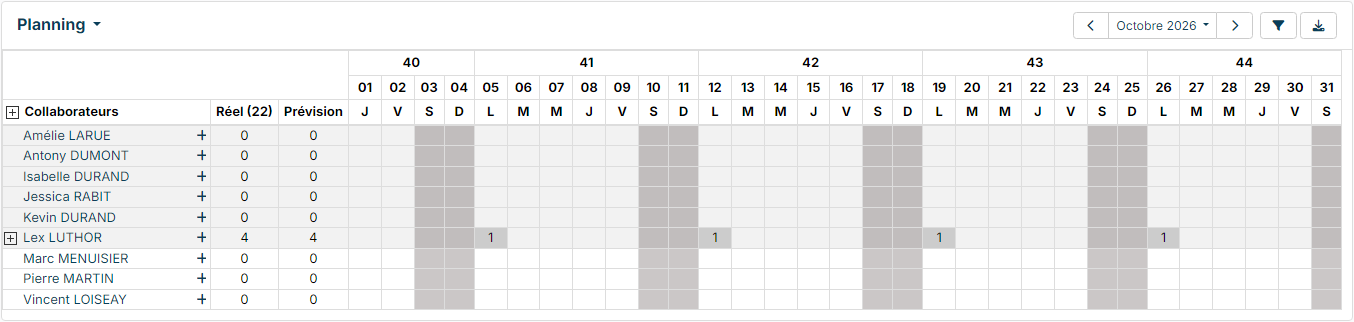
My Team > Staffing computes, over the chosen period, each person's billable activity, the total entered, the missing days (Control column), the working days and the Staffing rate.

Approving
When a sheet is sent, the approvers of the first step of the circuit receive a notification in Nicoka and an email. The link opens the sheet with the approve and refuse buttons. Depending on the step settings, a comment may be required. All pending requests are gathered in My Team > A valider (approvals to do), where you approve or refuse without opening each sheet.
4. Setting up the module
Open Customizing > Modules and click Customizing on the Time management card. The left menu offers the following sections.
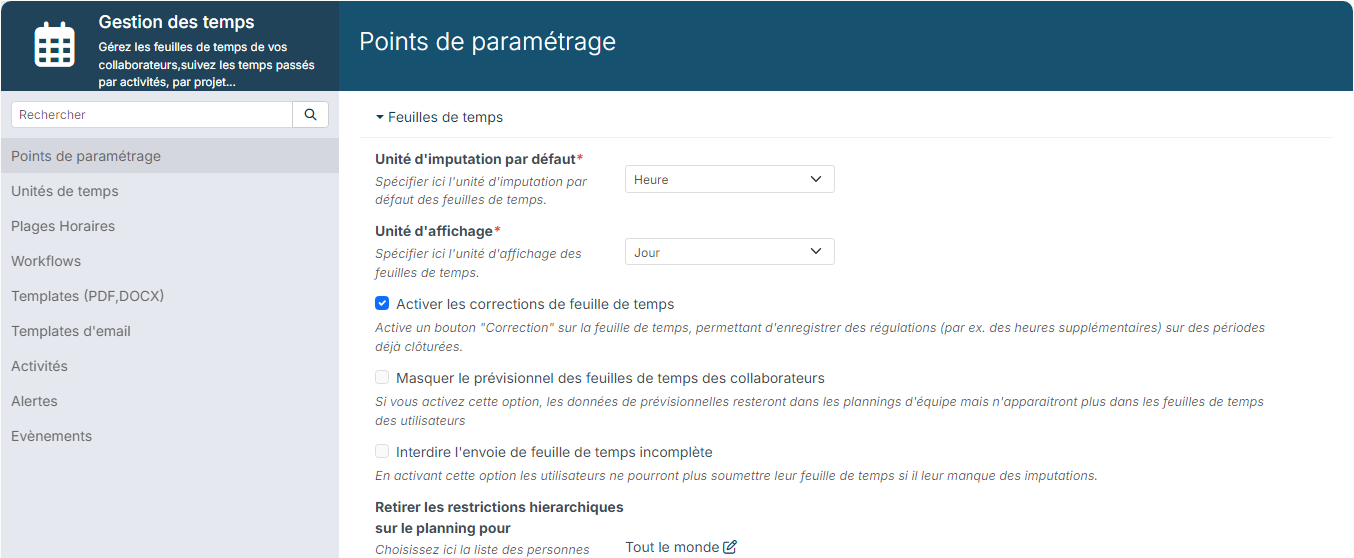
- Customizing points:
- Default imputation unit and Display unit (hours or days);
- timesheet corrections: the correction button on closed periods;
- hiding the employees' forecast from their timesheets: it stays visible in the team plannings;
- Prohibit sending incomplete timesheet;
- Remove hierarchy restriction on planning for: the people who see everyone's planning;
- Reminding email template;
- People who can reopen a validated Timesheet;
- the Order balance column (ordered quantity minus the time already entered, per activity) and the remaining work column.
- Time Units: 5 minutes, quarter hour, half hour, hour, quarter day, half day, day, and your own units. For a unit in hours or minutes, the conversion into days uses the number of hours in the employee's working day.
- TimeSlots: the slots of the day offered for entry (day, night, on site, remote…), with their hours and their icon. A project activity picks the slots it allows: the timesheet then shows one line per slot, with the slot icon next to the activity. A line entered on a night slot is shown on a dark background, and the "Night" legend appears under the grid.
- Workflows: the approval circuit of the timesheets, its steps and its approvers.
- PDF / DOCX Templates and Email templates: the export templates and the module's emails (reminders, notifications). On a timesheet template, the Template settings block offers Days without any time entered: not listed, listed on working days, or listed every day of the month. To group the lines by week, add the Week number column to the lines table, sort the table on that column and tick Group by sort: each week shows as a title (for example 2026-S44). The TimeSheet - Monthly calendar template also offers Show the job title (the person's job title under their name, ticked by default) and Always show the time slot (the time slot on every line, even when the activity has only one in the month).
- Activities: the activity types time can be entered on, to enable or disable.
- Alerts and Events: emails or notifications triggered in a specific situation.